Showing posts with label GS Astuto. Show all posts

03 September 2022

Into Gunma

On my last ride before a trip to the US in mid/late August, I wanted to get Voyage Voyage (the Ti Travel bike) rebuilt and working like new so I could take it with me in the box ... this time leaving it with family in the US so that it would be there for subsequent trips over the next six months.

I rebuilt the rear wheel, replaced the rear derailleur, adjusted everything else, and was pretty much good to go. Except ... once I put on the chain and tried to shift, it was clear that the derailleur hanger, integrated into the Paragon dropout, was bent far to the inside, to the point where the bike would not shift properly on the inner 2-3 cassette cogs, and was not as smooth or crisp as it should be on the rest of the gears.

So I paid a visit to GS Astuto and Tim Smith. Tim produced this frame back in 2012, and he has the tools and knowledge to properly align the hanger and "cold work" the Ti dropout back into place without causing so much metal fatigue as to make it into a piece of junk. 

I took an early shinkansen to Takasaki, then a local to Matsuida, a few kilometers from his home/shop/cafe - GS Astuto Matsuida Base. It was already hot as I rode to the station in Tokyo ... but Gunma air felt fresh, a breeze and while it was going to warm up it was still tolerable. The renovation work on his home/shop/cafe has advanced dramatically since my last visit, the finish line in sight.

My bike bag has the Matsuida train station parking lot to itself!

Fortunately, Ti is a lot more resilient and less subject to fatigue than aluminum alloys, and the Paragon dropout is beefy to begin with. So Tim was able to get it properly aligned.

Tim puts his shoulder into undoing the damage from the pickup truck.


Back in alignment.

Visible damage to the dropout from the pickup truck crash in Washington State.
... but the dropout has enough extra material so it still functions.

The master, Tim Smith, with the fully repaired Voyage Voyage

The repair was done and now I had a bike that was rideable, and a glorious day in Gunma to ride it.

Where to go? As already reported on Strava, ....

My initial thought was to head back to Tokyo (Plan A).  
I headed ESE from Matsuida

I've been through here before ... on the way to Tomioka/Fujioka

Some welcome shade as I pass Higashi Tomioka Station
As I rode, I decided to go via Chichibu (Plan B).  
Looking out over the Oni-ishi (鬼石) area of Fujioka, and toward the Saitama/Chichibu border.
But then I thought ... I am already at the entrance to route 462 and nice areas of southern Gunma mountains, so maybe I can go into Kanna and over Tsuchisaka Pass (Plan C). 
I took a detour on the south side of the big reservoir in Kanna (Plan D).
I had a good feeling about the detour -- very very low traffic volumes!

Left side Saitama, right side Gunma!

Small solar farms on the hillside just above Route 462.

Viewpoint above the dam.

The sound of the water and a bit of mist gave welcome cooling on a climb.

The road on the South shore of the lake ... was fine with my very grippy Panaracer Agilest tires.

Big suicide prevention hotline sign at the entrance to a bridge over the lake. ... I wonder why here?

When I finally got to the entrance to the Tsuchisaka climb and saw that the road was closed. So I continued toward Shigasaka Pass and thought, perhaps I would do the rindo between Shigasaka and the Mitsumine entrance area (Plan E).  I decided that would be too long a trip home. 
Maybe just Shigasaka and Route 299 then Yamabushi and on to Oume (Plan F). 


Men fishing for Ayu in the Kanna-gawa

But I did not want to do the crowded slog up Route 299 to the tunnel entrance, and thought ... if I just go West, I can go over Jukkoku and down to Saku, and hop the Shinkansen home. Nice route, cooler weather, and someplace I do not get to as much as I would like. Fast train. ... (Plan G).  
But as I got to the west end of Uenomura, the weather forecast showed thunderstorms over Yatsugatake and heading toward Jukkoku. I got stuck up there once when the weather turned on me, alone, and that was one of the scarier circumstances of my rides in Japan all these years. A bit of PTSD?  

I am the blue dot at the right edge. ... would go toward the storms if over Jukkoku.

I stopped at my favorite Kawa-no-eki in Uenomura to figure out my plan.
Back of display cabinet in the window at Kawa-no-Eki


The valley toward Budoh Pass.

Anyway, I would go through the tunnel out of Uenomura to the North to Nanmoku, as in my Tyler Hamilton commemorative ride, and down to Shimonita and take the train from there. (Plan H).
  ... except that I missed the train and instead rode to Takasaki (Plan I) rather than wait 40 minutes for the next very slow, local train. 
It was a glorious day on the bicycle ... until my tubeless setup failed me between Shimonita and Takasaki, necessitating repeated stops and attempts to pump up first the rear, then the front tires. The rear held air once I added a bit more sealant and tightened the valve ... but the front, which first lost air aboug 15kms from Takasaki Station, was hopeless. I made it on average 2-3kms between pumpings -- just far enough so that it was not worth removing the valves and putting in tubes. (Of course, once I was home and had a proper pump to mount tubeless tires, it was no problem getting it working again.)
Rear tire lost air here ... Nanmoku.

Front tire lost air near here, about 15kms from Takasaki

Shimonita has its Konnyaku Park ... so the town down the road has a Mentai Park.
I thought mentai was from the sea ... fish roe?!

In the end, my Plan I ride looked like this:


12 June 2022

New Wheels Day - Joining the All-Road Bike Revolution

The RAMAX has proven a fast and comfortable bike for long day rides. So far, the longest trip has been the 300km Beef Line/Green Furusato Line brevet in Ibaraki.  I have not yet ridden it on 400km or longer rides because of the lack of a front wheel with dynamo hub that fits with the 12mm thru axle and disk brake specification.  For a 400km or longer ride, I don't want to worry about battery life for my front light. Problem now solved!

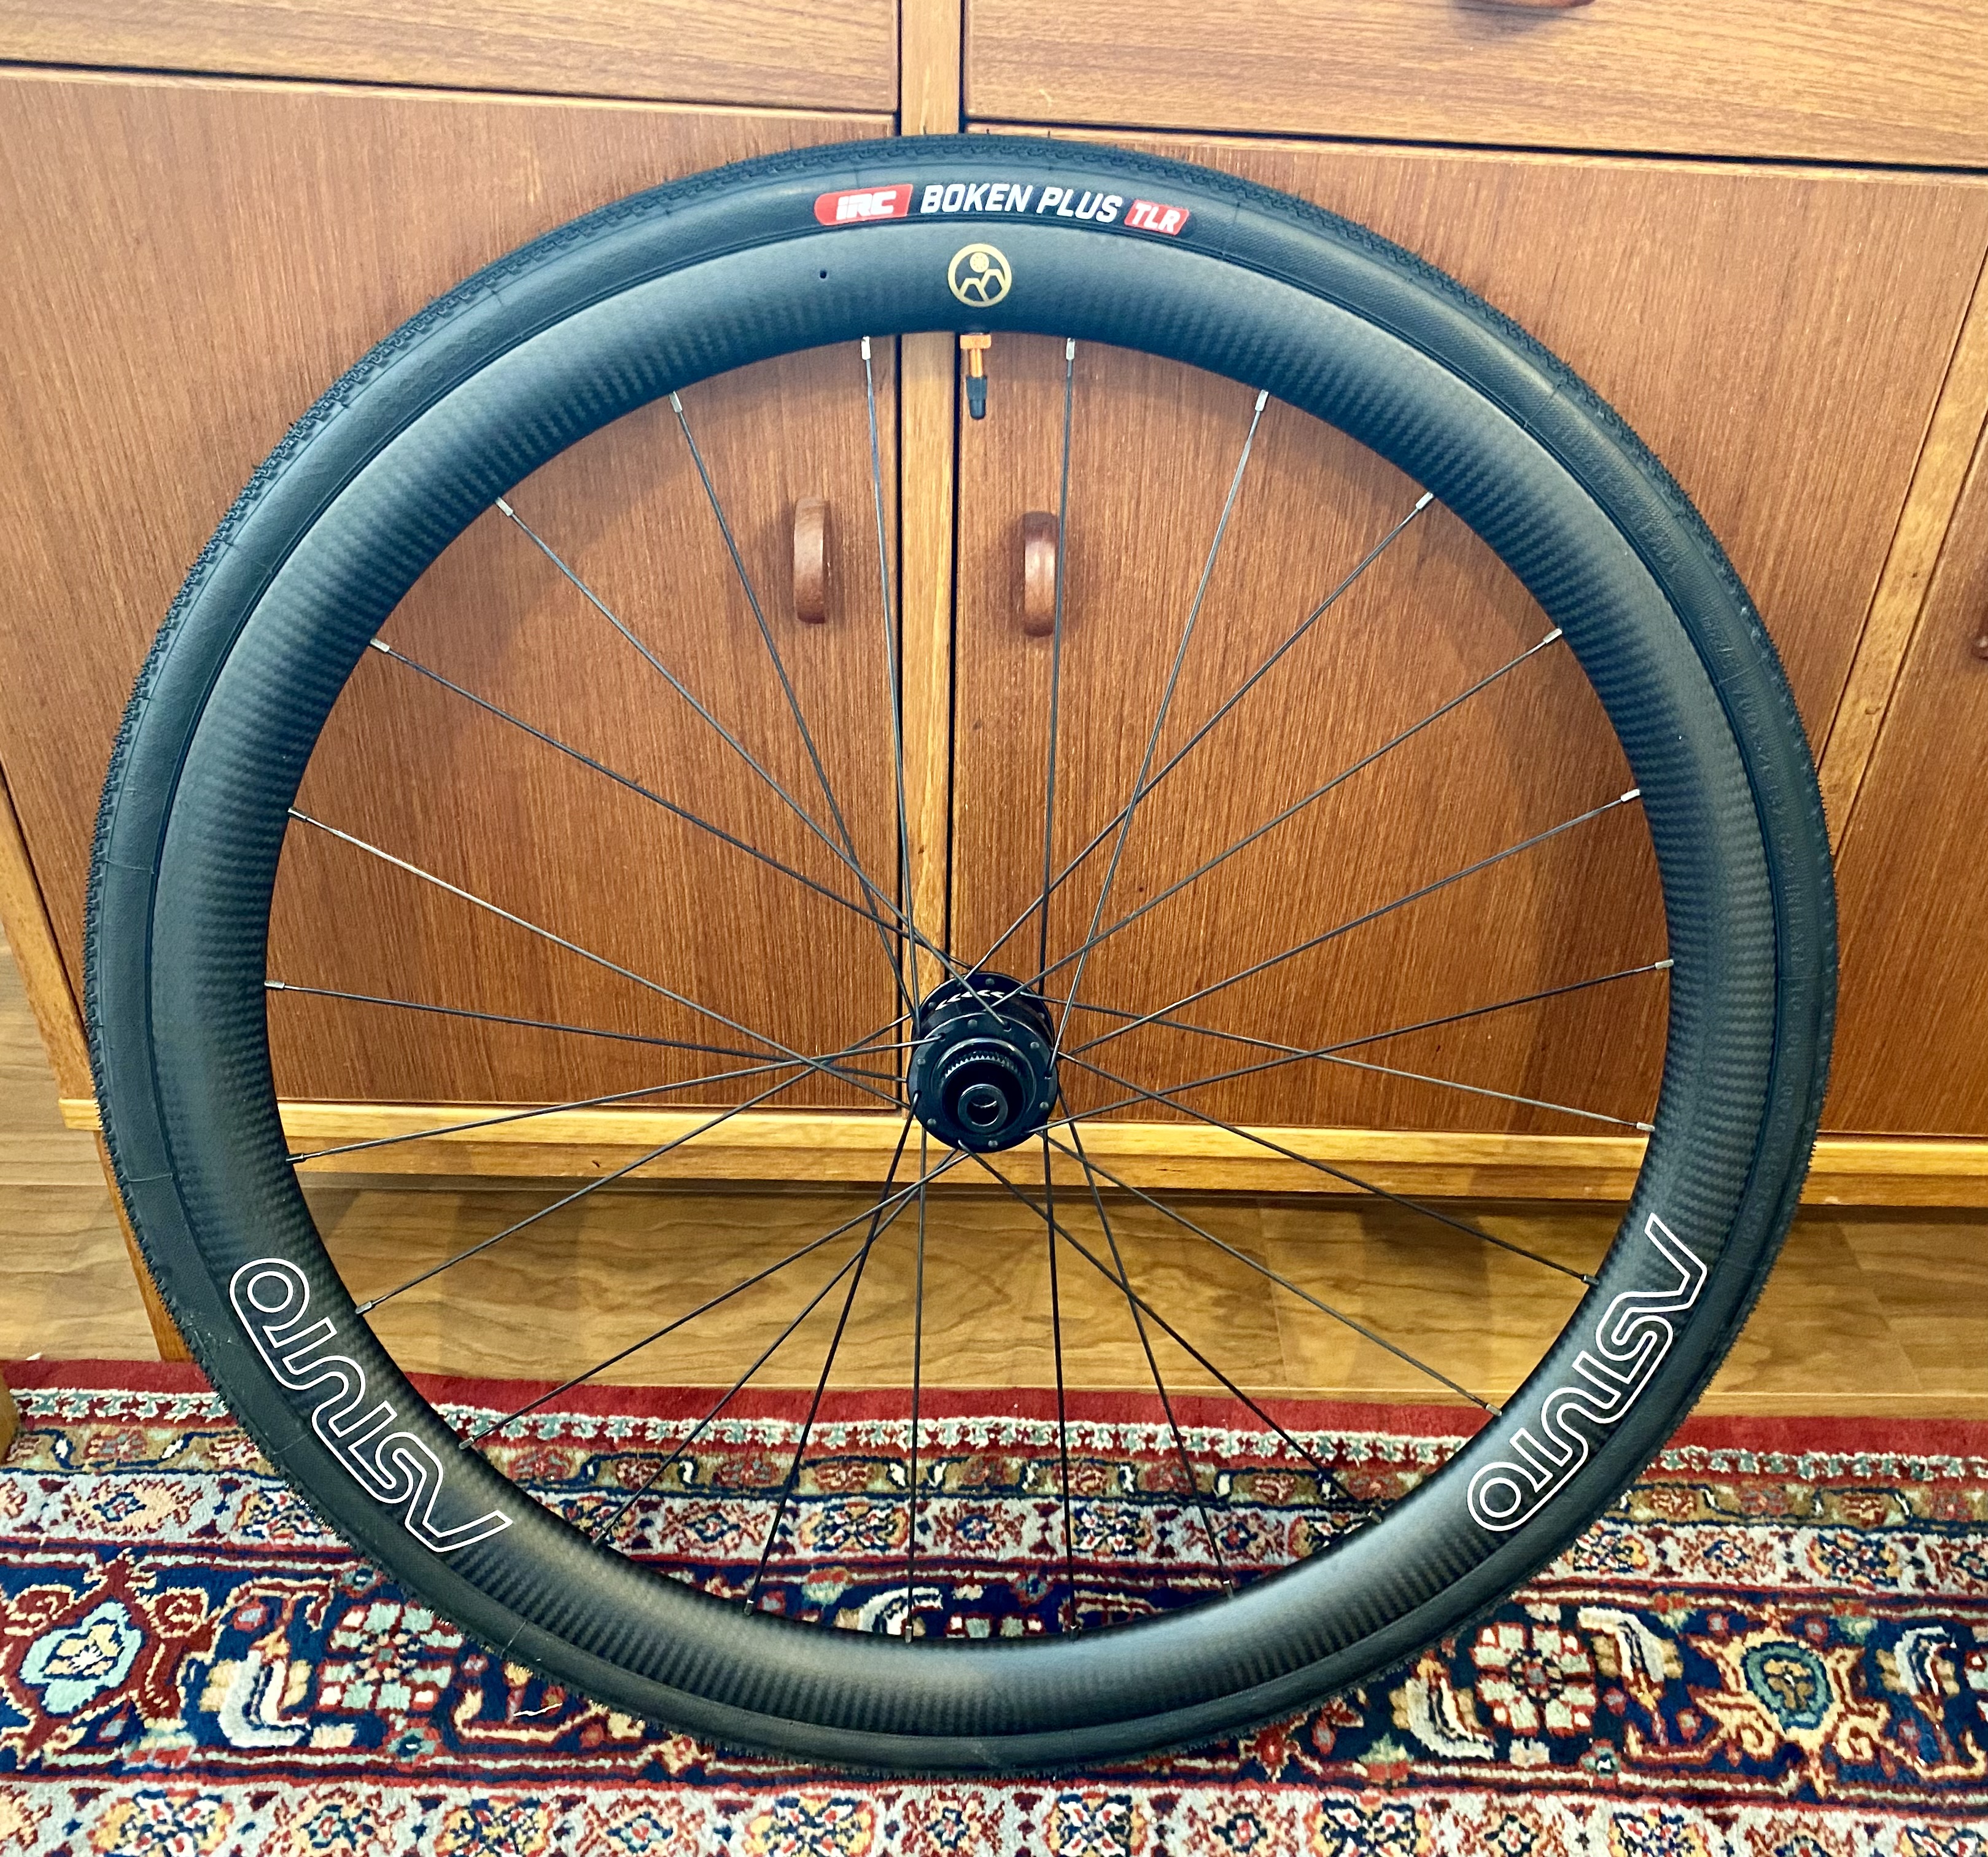
On Friday, a beautiful new set of handmade GS Astuto EV36+ wheels arrived. 


The carbon rims are WIDE, 32mm outer width, and 36mm deep. For comparison, my typical Velocity A23 or H Plus Sons Archetype rim, which once were considered "wide" rims, similar to the early HED Belgium rims, have a 23mm outer width. The GS Astuto EV36+ are more like the Miche Graff Route wheels ridden by the winner of last week's Gravel Unbound, Ivar Slik. as he went 200 miles (322 kms) on a variety of surfaces at an average speed of 34.4 kph. They are a similar hookless carbon rim, 36mm deep, 30-32mm outside width. Even the current Zipp 303 Firecrest tubeless rim, which has a definite "road" racing heritage, now has a 30mm outer width.


Since the EV36+ rims are carbon, hookless and disk-brake specific, they can be both very light and strong. Indeed, the box they arrived in felt ... as if it were empty!

Hookless rims are lighter weight and easier to manufacture than hooked ones. They should only be used with a compatible tubeless setup and at lower pressures than a typical road bike. Given the width, of course, they must always be used with larger width tires that are designed for lower pressure. (The tires should be 30mm wide or greater to fit the EV36+ rims.) Hookless rims will help drive the high end of the cycling market toward the conclusions Jan Heine of Bicycle Quarterly/Rene Herse has been preaching the past decade in numerous Bicycle Quarterly articles and his book, The All-Road Bike Revolution: wide supple tires run at lower pressures are as fast or faster, and a lot more comfortable, than narrower tires run at higher pressures.

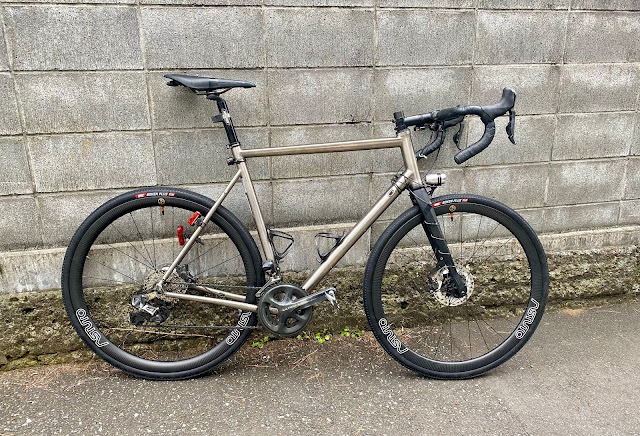
The RAMAX finally as it was intended--An all-road adventure bicycle.

Both front and rear wheels have 24 Sapim CX-Ray spokes. CX Rays are the best spokes by far, in my experience.  They combine strength, light weight, and aerodynamics. Unbeatable. Not cheap, but worth every penny. I used to break spokes regularly. When I switched to building (and in this case, having built for me wheels with CX Rays ... the problem pretty much went away. For an aluminum clincher rim, I would hesitate to use a 24-spoke rear wheel, even with CX-Rays, but for these wide, deep and stiff rims, with fatter tires running a lower pressure, a 24-spoke setup should be fine even for challenging, off-road conditions.

The rear hub is an OEM/private label model made for GS Astuto, and the front is an SP Dynamo PL-7. The hubs are for Centerlock disk brake rotors -- Tim Smith tells me that the Centerlock design, a Shimano standard, is better, and I now agree. It is a lot easier to put the Centerlock rotors on (and take them off) and to get them in exactly the right position than with the 6-bolt style I am accustomed to using. And indeed, the weight of the dynamo hub for Centerlock is 10g lower than the corresponding 6-bolt style from SP Dynamo.


The PL-7 is SP Dynamo's newest model, released just before the pandemic. It is about the same weight as the SV-8 models I have used in the past, but offers more power output at the same speed. It is noticeably lighter than SP Dynamo's previous disk-brake specific versions, but it looks and feels just as solid. The hub is designed for the now-common 12mm thru axle specification, which offers the possibility of a stronger axle than a 9mm QR. (Some hubs can be converted between QR and 12mm thru axle by changing the end caps, but most older hubs cannot).

For tires, one of Tim's suggestions was the IRC Boken Plus 700x32mm version. It is a gravel bike tire with a slick middle strip so that it can go fast on tarmac as well as handling rough or muddy surfaces. IRC is a Japanese brand that is not as widely known as some European tires (Conti, Vittoria, Michelin, et al), but IRC was one of the early adopters of road tubeless technology. IRC stands for Inoue Rubber Corporation -- headquartered in Nagoya and with production facilities in Sendai as well as in SE Asia). The Boken Plus has gotten some good reviews so I was happy to try them.  They feel as if the side walls are relatively supple -- crucial to making a tire fast. And IRC has a lot of experience with tubeless -- these hold air extremely well and, Tim reports, set up very easily.


Matched with the wide EV36+ rim, the tires actually measure at 35.5mm width -- and seem to have a large air volume similar to the 700x36 Challenge Gravel Grinder tires that were on the loaner wheels when I first got the RAMAX.  So while, for gravel tires, they are near the "narrow" end of the spectrum, for me they are huge. I inflated them to 55psi or 3.8 bars of pressure. I will try 45-50psi or even lower for rough surfaced roads. But years of riding at higher pressure has gotten me stuck in my ways, and it will take awhile to change the prejudice that a tire needs to be "hard" to the feel to be fast. 

I took my first long ride with the new wheels on Saturday -- 200 kms entirely on tarmac. The ride feel was comfortable and smooth as silk. My overall moving speed for the day, 23.5 kph, was about what I would have expected for a 200km ride with ~1500m of elevation gain, a long gradual uphill grind and much less downhill, in humid weather.  If I struggled at times, it had more to do with the humidity and that farewell party for a friend that I attended the night before than it did the wheels. Indeed, the wheelset is so light that even with the heavier gravel tires they do not feel heavy or sluggish -- a feeling that has turned me off of gravel tires in the past. Even with the gravel wheels, the bike still climbs well, and it descends like a dream on tarmac. What once might have been a kind of "white knuckle" descent at high speed at the end of the ride, was very relaxed though my top speed seemed no different.

I look forward to many years of riding with this wheelset.  Tim is already suggesting that I might want to try them with a pair of super supple, lighter Rene Herse tires at some point ...but for the time being the Boken Plus will do just fine.

15 March 2022

New Bike Day -- RAMAX, a Very Modern and Beautiful Titanium Frameset

Obligatory new bike photo.


Nearing Takasaki, along the Usui River

On Wednesday, March 9, I went to GS Astuto in Matsuida, Annaka City, Gunma. The plan was that I would ride my Renovo there from Takasaki and Tim Smith, with a bit of help from me, would take the Ultegra Di2 disk brake groupset off of the Renovo and install it on a new frameset, a titanium RAMAX (Randonneuring Adventure MAXimum), that I would ride home. 

The RAMAX frameset is Tim's design and incorporates everything he has learned from more than a decade of designing the Astuto titanium frames and accommodating the latest updates in components and styles of riding. He told me that his idea was to "future-proof" the design so it is versatile and works with the latest components and any coming down the pike in the next few years.

My last new frameset purchase (aside from the Pelso recumbent) was in 2015. Things have changed a lot in seven years. Back then, there was almost no "gravel bike" or "all road bike" category. Clearance for wide tires on a road bike, even an endurance road bike, meant 700x28mm or maybe 700x30mm tires, not 650Bx50mm. Disk brakes were on the way in, but still in a distinct minority. Axles were mostly QR (quick release), not the beefier 12mm thru-axle. Rear wheel spacing was a standard 130mm. Electronic shifting was still a limited, high-end option. Large diameter press-fit bottom brackets had started to proliferate, bringing with them problems of poor fit that had yet to find a solution.

Tim unwraps the frame

GS Astuto headbadge

Lovely curves, fender attachment

Beautiful welds. 

I love my current titanium frameset, the Ti Travel Bike with S and S couplers. In fact, I am planning a major component makeover for the bike's second decade. But I got that frame from Tim/GS Astuto in 2012, an early vintage. The Ti Travel Bike is designed for rim brakes, a mechanical (but not Di2) groupset, it has a standard BSA threaded bottom bracket shell, and can fit only 25mm or 26mm wide tires in the rear, not 28mm or wider. The RAMAX is made from the same raw material, but a different beast.

Titanium has long been considered a highly attractive material for bicycle frame tubing. Larger riders, especially, praise the "lively ride feel" of titanium frames -- which can be quite similar to the feel of the best steel frames. It is far lighter than steel for the same tensile strength, and far stronger and much more resistant to metal fatigue than aluminum alloy. Titanium is highly resistant to corrosion -- another advantage over steel frames -- such that the frames do not need to be painted.  And titanium can get banged up a bit without generating that gnawing feeling in the pit of the stomach one gets on a carbon frame that has taken impacts. The combination of resistances to metal fatigue and corrosion make titanium the best candidate for a "lifetime frame".

But titanium tubing has undergone a revolution in the past decade. Titanium historically was a difficult (and expensive) metal to form into tubes of various shapes. So a typical titanium bike in 2012 (e.g. the Ti Travel Bike) had round tubing for its four main tubes -- head tube, top tube, down tube, and seat tube. Round tubing may not offer as good ride qualities, or power transfer/stiffness, as other shapes. This practical limitation was removed with the invention and gradual expansion since 2012 of "hydroforming" techniques that allow fabricators to make tubes of various shapes more easily and economically. The RAMAX takes advantage of this with an ovalized down tube and seat tube that attach (are welded) to the bottom bracket shell in shapes that offer far greater lateral stiffness. This offers a feeling of stiff power transfer I have only before felt on a carbon-frame bike. The RAMAX top tube has a nearly flat top side -- aesthetically very pleasing and also offers increased lateral stiffness. 

Headset cups are set in now.

The RAMAX seat and chain stays offer clearance for up to at least 650Bx48mm tires (perhaps 50mm?). The head tube is a larger diameter and will accommodate different diameter fork crowns depending on the headset used. The all-carbon fork also offers lots of clearance for tires, looks lovely and while noticeably beefier than that on, say, my old Canyon Ultimate CF, is far less heavy and more graceful than some of the early disk brake CX carbon forks.  The BB shell is T47 -- the logical answer that gives the "best of both worlds" -- the larger diameter of those troublesome press-fit designs, the stability and easy installation/removal of a threaded BB, and adaptability to many different crankset standards.  The frame is designed for thru axles, which are now widely favored over QR skewers for off-road applications such as gravel and are safer and work better with disk brakes as well. (Most disk brake road bikes now come with thru axles -- some hubs have end caps that can be replaced to accommodate either QR or thru axle ... but not all, and certainly not older hubs.)

I made a new friend -- Latte.

My wheelset on the Renovo (Velocity Aileron rims) is a disk brake set with hubs designed for QR skewers (not adaptable to thru axle), ... so Tim lent me a similar set of Ailerons with thru axle hubs. He is building me another set, as soon as I can get a dynamo hub with thru axle for the front wheel. ...  I will use the Renovo wheelset as a backup for the Pelso (which is QR drop outs/disk brake).

The RAMAX has a "direct mount" for its rear derailleur. This is a Shimano design that works with their newest derailleurs. It offers a very solid and secure connection and should avoid the typical derailleur mis-alignment issue from a minor bump of the derailleur somewhere along the way, in transit by rinko bag perhaps. (SRAM does not use "direct mount" but apparently has its own similar "universal derailleur hanger" design in the works). The direct mount cannot be used with an older "classic" derailleur. In building up the bike, this was the one place where my ca. 2014 Ultegra Di2 groupset would not work on the bike. Instead, I swapped my Ultegra Di2 rear derailleur for a GRX direct mount version Tim had on one of the Astuto bikes. He tells me he has use for the Ultegra derailleur on a bike that has a "classic" derailleur hanger. After a firmware upgrade, the GRX/Ultegra Di2 combination worked (and works) perfectly.

The disk brakes ... well, Shimano hydraulic disk brakes are very nice.  They are a bit heavier than rim brakes, and not as easy to fix if there is a problem at roadside on a cold, wet night, ... but they work beautifully and, set up properly, can work without adjustment for a long, long time. They are far better in the rain than the typical rim brake set up. They also solve the problem of a heavy rider melting rims on a carbon clincher with rim brakes. And with a hookless set of disk brake-specific carbon rims, the weight differential disappears.

How does it ride? Well, my first impression is that it will be an extremely capable, balanced, and comfortable bicycle! It feels light and quick, even with the 700x36mm somewhat knobby gravel grinder tires. The BB is 1~2 cms higher off the ground than on a road bike -- not just the fatter tires, but also a bit of CX/gravel design? The seat, bars, etc. are all similarly higher. As mentioned above, the bike feels very responsive and alive. And it also feels ultra-solid and reliable in corners (this could be the wide Aileron rims and Challenge tires ... but it is the whole system). I suspect that, with time, this solid feeling will add to my confidence and I may find myself going downhill a bit faster, laying off the brakes a bit more, than in recent years. 

I will get the bike dialed-in over time. I will eventually have a front hub with an SP Dynamo for 24x7 lighting. And I will have lots and lots of opportunities to ride it in coming months and years. I'm looking forward to it!


01 April 2016

Effetto Mariposa Tubeless Conversion for the Renovo

When I picked up my new front wheel for the Renovo last week at GS Astuto (SP Dynamo SD-8 hub, Velocity Aileron reflective rim), Tim Smith confirmed that the Aileron is a "tubeless ready" rim and can be converted for use with road tubeless tires by adding the right rim tape and valve.

This offered a perfect opportunity to use the Effetto Mariposa tubeless conversion kit I got last year.  Last night, mission accomplished!  For someone who has used a tubeless set up before (or even who has not, but can follow some very basic instructions), it was very easy.  Just clean the inside of the rim, unroll/smoothly apply the tape to the interior (2x wrap for higher pressure road tubeless), insert a hole (I use an awl) for the valve and firmly press it against the rim interior and use the included washer and threaded ring to secure it.  Then fit the tire and add air with a floor pump.

The conversion kit worked just GREAT.  And the kit includes a tool case that will fit in a water bottle holder, plus lots of sealant -- several years' supply?

The front tire filled with air, pulled its bead into the rim's "slot" and held its pressure the very first time.

Enough tape for 2 standard (622) road rims, each wrapped with a double layer.  Second valve not shown.
For the rear wheel, it looked as if the rim already had internal sealed tape on it ... so I tried using that and failed to get the rim to hold air a few times before giving up, removing that old tape, and using the Effetto Mariposa tape.  After trying again, the rear also held air the first time.  As painless a tubeless tire installation as I have ever experienced.

I also swapped out an 11-28 rear cassette for an 11-32, if I am going to use this on hilly ultra endurance events with its 52-36 crank.  I bled the front disk brake ... which had been very soft.  That seems to have worked (though still not as tight as the rear brake).  And I have removed the fenders -- should be easy enough to put them back on so I can "rinko" plausibly with this bike.  I may want to change some of the bolts/nuts so I can install and remove the fenders without needing a "+" screwdriver.
Today, now that I am comfortable the tires are holding pressure well, I will add Caffe Latex sealant. Then ride!  
If all goes well with this setup, ... I will definitely use the Renovo on April's Fleche.  Fast, smooth, comfortable tires, an SP Dynamo hub and Busch Mueller light, shock absorbing Renovo frame.  Di2 Ultegra shifting. Just thinking about it fills me with anticipation!
If all goes well on the Fleche ... maybe Okayama 1200?


The rim looks almost carbon grey/black, ... but with a camera flash (photo at top of post) is very bright: reflective.

Update:  I added the Caffe Latex sealant and rode the bike to/from work.  These 700x25 Schwab One tubeless tires are very smooth and fast, though I would be hard pressed to say if they feel as comfortable as the 700x28 Continental Four Seasons.  They do feel fast.