09 October 2012

Hard Ride

Jerome and I successfully completed the Kanagawa October 6 (to 7) 600 kilometer Brevet.

It was a very hard ride.  8000 meters of climbing or a bit more, with plenty of steep hills even during the last 100 kilometers back into Tokyo.

We finished just after 10PM Sunday evening, 38 hours after the start and about 2 hours slower than other 600km events I have done in the past.  When we finally left the finish area for the drive home about 45 minutes later, the tally remained:  7 finishers, 12 DNFs, and 6 riders still out on the course, with another 1hr 15min left in which to make it back.

Audax Parisien has recently established a new category of event, the "Super Randonee 600".  These are rides of 600 kilometers, with at least 10,000 meters of climbing.  Completing one is now required in order to get one Audax award.  But the Super Randonee 600 events have a 50-hour time limit, instead of the usual 40 hours for a 600 km Brevet.  A good idea.
On the climb to Yanagisawa, river below and steep rock walls above
The weather on Saturday was good.
The weather on Sunday was even better.

The problem was in-between.  It started to rain around 6:30PM Saturday and did not stop completely until Sunday morning around 8AM.  So we were in rain, dark and cold for the climb from Chino up to Lake Shirakaba in Tateshina area, over Daimon Pass (approx Elev 1450 meters) and down a valley to around 600 meters elevation ... and once more back up the North side of the same pass.  This stretch, and the aftermath of riding wet through most of the night to get to the next checkpoint and far enough of schedule for some decent sleep ... claimed most of the DNFs.

SW of Kofu on Saturday afternoon looking to the Japan Alps

More SW of Kofu on Saturday afternoon
I did not get any photos, but the climb up Route 71 through Asakiri Kogen and Kami Kuishiki Mura, was beautiful.  Likewise the village of Saihara on the way up to Tawa Pass and Tsuru Pass -- idyllic Japanese village life, with the crops ready for harvest and the trees just starting to turn colors.

05 October 2012

Positivo Espresso Wedding

Since returning to Tokyo from the P.E./Beeren Pyrenees tour and P.E. London wedding, I have fallen down on the job of maintaining the P.E. blog -- barely sufficient time to ride a bike, let along write about riding a bike.

But I am particularly remiss in not posting here about what must be the greatest event in the long history of Positivo Espresso -- the wedding of the two members of the Positivo Espresso Europe team from Transalp 2011 and 2009 -- Juliane Prechtl and David Jacob!  

It was an incredible party and and incredible weekend, with the entire P.E. team (not to mention tennis-playing spouses) being treated like family.  Actually, we were treated better than family.  And, in case there was any doubt, the photos of the bride and groom are proof that cycling keeps one fit, keeps the girls beautiful and the boys handsome!

Team members in attendance included Stephen, Jerome, M.O.B. and myself.  Jerome even played a role in the wedding processional.

Enough words.  A few photos (and then back to work).

Jerome steals the show as the couple enters the courtyard.  Our first glimpse of Juliane (aka "Queen of the Mountains") in her incredible "Greek Goddess" dress.

David turns to give us a good view of his "Bradleys" -- sideburns in honor of Mr. Wiggins.


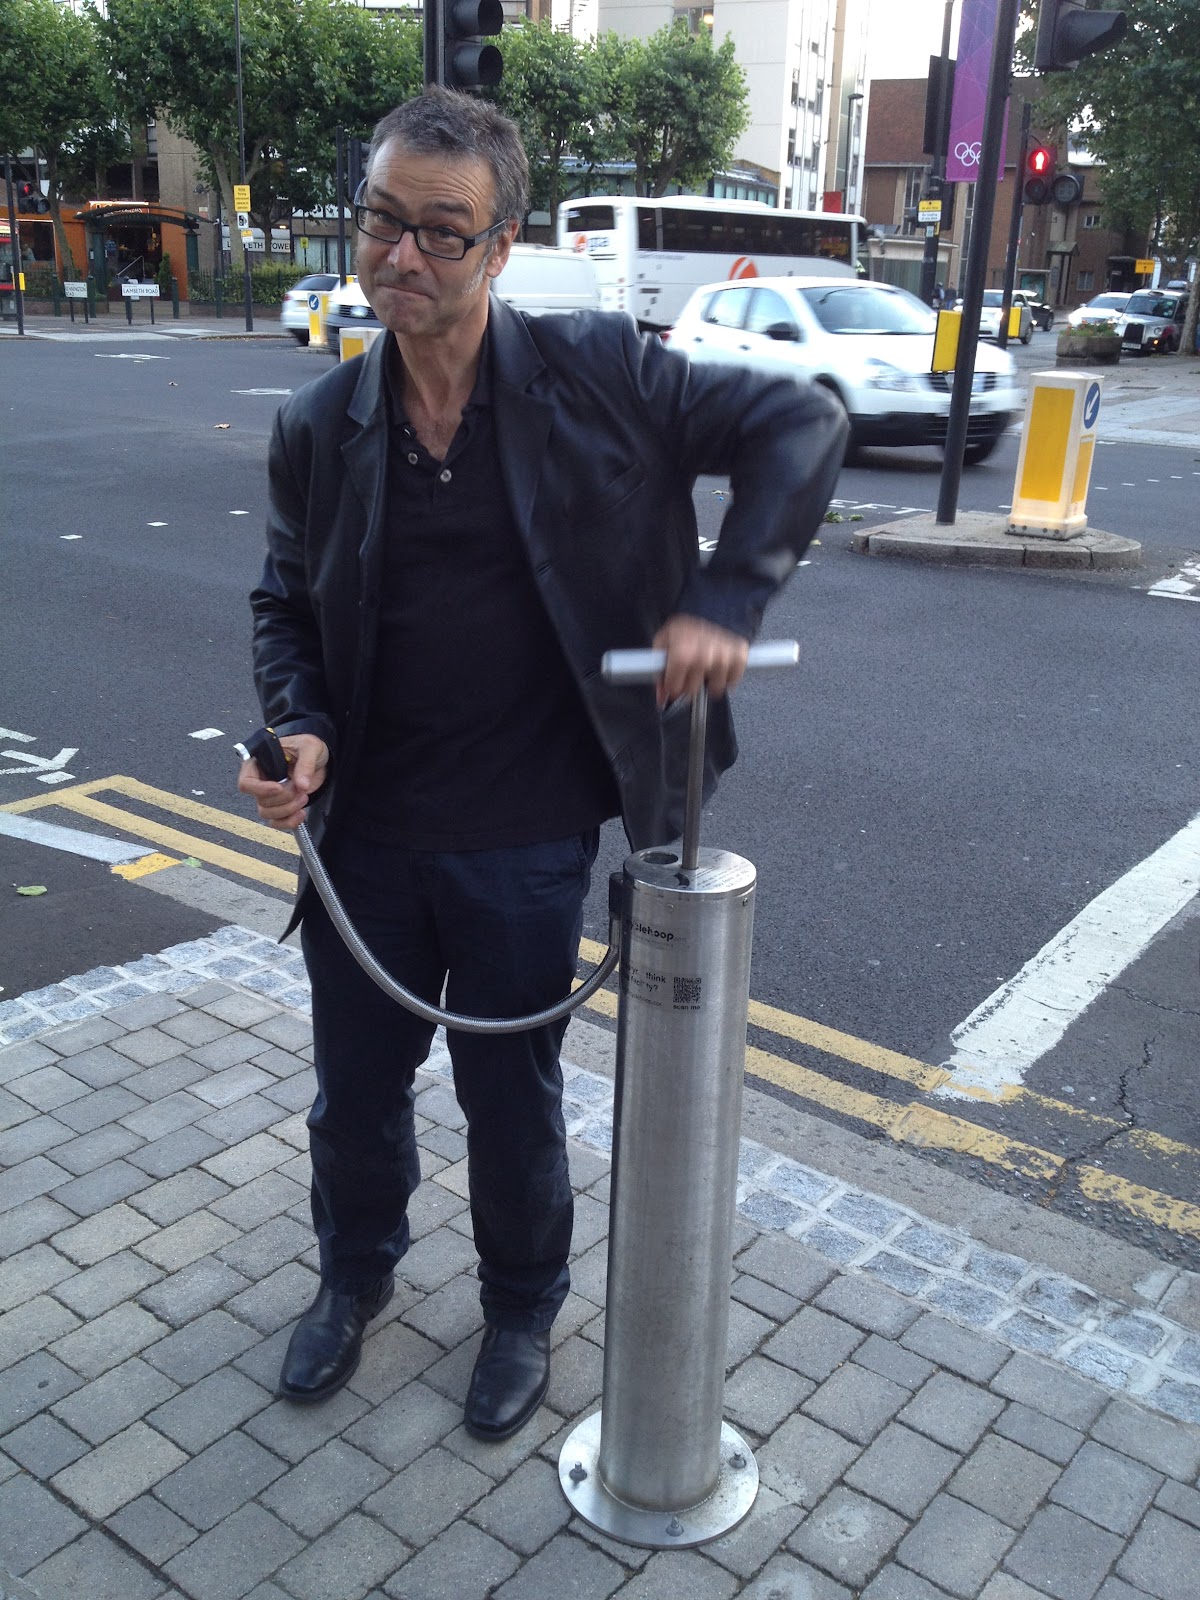
And we were not the only ones in London who are "jitensha baka".  There have been over 16 million trips since 2010 using the rental "Boris Bikes", which seem to be visible just about everywhere, as with the rental schemes we saw in Paris (Velib) and Dijon (Velodi).  There are so many bicycle commuters passing through David and Juliane's neighborhood that a very sturdy tire pump has been installed on the curb outside the neighborhood pub.  David offered "free refills" as commuters stopped at the red light.


Even inside Heathrow Airport, there was a crazy cyclist riding a fully loaded tourer around Terminal 5, offering emergency medical care to anyone in need!


30 September 2012

Brevet Training - Yanagisawa and Kazahari

Jerome and I have been a bit nervous about next week's 600km Brevet.  Looking at the course, the climbing goes on and on, and on.  So we decided to try a "test" run and do the first big pass of the event -- Yanagisawa.

We had been thinking about continuing on over Kami Hikawa, but a slow start, an early rest stop at the Seven Eleven a few hundred meters from Wachi-san's bicycle shop in Oume, and my front wheel going flat soon after, put us a bit behind schedule.  We also stopped for food/water refills in Okutama and Tabayama.  And I had some foot pain on the climb, but pretty much resolved it by shifting a cleat on the SPD/MTB shoes I was wearing, requiring another stop.  On the climb, Jerome went ahead and made it up about 10 minutes before me.

The weather was nice, really nice considering typhoons past and future in the forecast.  A bit sticky, but not too warm on the climbs, and not at all cold up on the passes.  A really good, classic ride.
Part of Tabayama just past the main town, including a graveyard with a very nice view.
On the descent, I had fun riding the Canyon, with the HED wheels and clip-on mini aero bars.  I'm more cautious and slower than I used to be, but still hit well over 70 kph on one of the straighter descent stretches.  The tuck position with the aerobars really does increase my speed on the flats by a few kph, while not seeming to require any more work.

By the time we got part of the way down, we were debating whether to do another climb, and which one.  Tsuru?  Kazahari?  Nokogiri?  Tsuru tsuru onsen?   Jerome Hill?  Kazahari won out.

So we ended up with 220 kms and 2500 meters of climbing.  I felt strong on the stretch back from Kazahari, and for once did more than my share of pulling Jerome late in a ride.  Now, if we can just get enough sleep Wed, Thur and Fri nights, we should be ready for next week.

19 September 2012

October 6 and 7 Monster Brevet

Jerome and I are signed up for a 600km Brevet sponsored by Kanagawa Audax starting on the morning of Saturday October 6, finishing late afternoon or evening of Sunday October 7.  

This promises to be quite a challenge, with lots of climbing.  I don't believe RidewithGPS's calculation of 16,150 meters elevation gain, but the truth could be around half that.  Rollers and "Jerome Hill" heading north along the edge of the hills out of town toward Okutama, out Route 411 over Yanagisawa Pass (elev. 1475m), the climb to Fujimi (elev 975m, west side of Yatsugatake), climb up over Tateshina/Daimon Pass (elev 1450m+) twice -- both going AND coming, then Fujimi again, then rollers along the Fujikawa west of Mt. Fuji, then a long slog up from near sea level over the west shoulder of Mt. Fuji on Pref. Route 71 (peaking over elev 1100m), then a return into town via Route 20 to Uenohara, a slight detour over Tawa and Tsuru (elev 875m) Passes, and again over "Jerome Hill" and more rollers.

If past years are any guide, early October can be ideal riding weather, and many sections will have very light traffic when ridden off peak hours.  Of course, the weather has been a bit unusual this year ... so no promises.

AJ Kanagawa website: 

http://www.aj-kanagawa.org/2012-brm/...6sagamihara600


Sign up on Sportsentry (1300 yen for Audax Japan members, 2500 yen for non-members, unsupported ride):
http://venus.sportsentry.ne.jp/event.php?tid=28800


15 September 2012

Positivo Espresso Spring Training 2013

Positivo Europe have secured spring training facilities in Mallorca for April 2013 - some may think a little late for spring training, but we feel the team is better suited to the Grand Tours rather than the early season classics.... we don't want to peak too soon.

We would welcome company! We are staying at Club Pollentia (http://www.clubpollentia.com/index_english.html) near Alcudia from 12th April to 21st April. QoM says she wants a couple of rest days to do SUP (aka Pocahontas see below)

The more the merrier.


24 August 2012

Flamenco Party in Seix!!!

Augustin's 3-col day!!!


Team Beeren 25th Anniversary Finish!

DJ and Stephen at Col de la Core

Just one more descent left!

Day 4--Heading up the last Col (de la Core)

Day 4--climbing in the mist


Mist on Col de Mente and Col de Portet d'Aspet -- Much easier than climbing in yesterday's 37+ degrees Celsius on Tourmalet.

Day 4-- Memorial to a fallen hero

Day 4--Oggie gets the white jersey

Day 3--DJ chases the QOM up Col d'Aspin

Every cyclist gets a photo here

Tourmalet!

Day 3

Day 3--breakfast at Col du Soulor

Day 2 Aubisque at dusk

Note the child playing on the bike on the background.

More Aubisque

Day 2 on the Climb to Col d'Aubisque

Day 2 descent into Arret--cows perched on high

Day 2 looking into Spain

Day 2. First climb.

Day 2 start at our Larrau lodgings

Col d'Iraty descent day 1

PEB Tour start

Positivo Espresso / Beeren Tour des Pyrenees

At the start hotel on August 19

13 August 2012

Bike in a (small) box

I had my first ride with the new Ti travel bike on Sunday, with Gunjira and Gueorgui.  We headed out Onekan, then the "tank road" and the north shore of Tsukui-ko, and then Pref Route 517 to Magino/Pref Route 76.  There Gueorgui and I headed back in on Pref Route 76/Route 20 over Otarumi and via Takao.  A frisky Gunjira powered on via Route 76 over to Doshi Michi and for some additional exploration.

The new bike rides very nicely -- everything works like a charm, with the new SRAM Red shifting and braking very precise in feeling.  It takes much less effort with my hands to brake or shift with the SRAM groupset.  There is a huge difference from the Dura Ace/Ultegra mix on the Canyon in the amount of effort needed to shift the front derailleur from small to big ring -- just a light tap of the paddle with my fingers on the SRAM, an effort using every muscle in my hand on the Shimano (.. maybe it is time for new shifter front derailleur cable, inner and outer).

The frame itself feels ... like Titanium, very alive, never harsh, and with good power transfer.

My only current complaint with the bike and set up is the 30.6mm seat post I selected.  A beefy FSA post for a mountain bike, it seems to be designed so that the bolts tighten with the saddle either 2 degrees tilting forward or 2 tilting back, never flat.  I may need to replace it.

And there were a few times, in the extreme heat and humidity, climbing 10% plus grades on Route 517, when I began to think it might be a good idea to swap in a compact crank for the Pyrenees.

This evening, I tried to see if I could pack the bike into its "backpack style" case.
The bike; The 26"x26"x10" case
Brake cable splitter. 
The bike needs to be separated into quite small pieces to fit in this kind of case.  I will need to allow some extra time for packing and unpacking, as compared with the Biknd case.  And I will need to figure out if I can do a less complete dis-assembly and still fit it, while minimizing risk of damage.
Bike in pieces
It was easy to fit the pieces into the case after watching Leonard Zinn do it, though I do not have a detachable link in my chain.  Now I just need to figure out how to secure, protect and avoid losing any of the various pieces.  I think I will start with some large plastic bags.  The bike, case and tools weigh just over 12 kgs.  ... so lots of room for other gear as padding before bumping up against weight limits.


UPDATE -- NEXT DAY:

It took me about 50 minutes to put the bike back together.  I needed to attach the rear derailleur to the dropout 4 times -- a couple times to get the cables routed properly, then once to get the derailleur positioned correctly, then finally I needed to take it off so the chain could reach far enough forward to slip it through the downtube coupler since it turned out the chain was hooked over to the wrong side it.  I'll get the hang of it with a little practice and hope eventually for sub-30 minute assembly or dis-assembly.

Comparing the bottom bracket (BB) with the SRAM Rival groupset on the Yamabushi, I realized that when I built the Ti bike up I mistakenly put some spacers on the GXP bottom bracket, based on the SRAM/Truvativ BB instructions for a 68mm BB shell ...  I read online instructions which suggest that the spaces are only for use with an MTB crankset.  Without the spacers the crank and bolts tighten properly and snugly, and still spin without friction.

After looking at the GPS tracks of our proposed route in the Pyrenees, this evening after dinner I swapped out the SRAM Red 53/39 crankset for my SRAM Rival 46/36 crankset (cyclocross gearing), taken off the Yamabushi.  At least with this crank, I don't need to change the BB (as I would if I used the Shimano 50/34 compact.  I think I will be much happier on the long climbs with 36/28 gearing than I would have been with 39/28.  And 46/11 is a big enough gear for this kind of non-competitive tour.

In other good news, after another 3 or 4 adjustments, I finally managed to get the saddle to be nearly horizontal on the FSA 30.6mm seatpost.

UPDATE - January 2013:

I replaced the MTB seatpost with a regular road 27.2 seatpost (Cinelli, basic aluminum model) and a sleeve that fills the gap between 27.2 and 30.6mms.  With a 27.2 seatpost the ride feels more compliant.  I think for sprinting and racing the 30.6 is probably better, but for long rides and comfort, I like the 27.2 post setup.

I also want to replace the shallow drop Deda bars (44cm outside-to-outside) with a set of the Ritchey WCS or Pro anatomical bend (44cm center-to-center) bars that I like on my Canyon and the Yamabushi.

05 August 2012

New Acquisition - Ti Travel Bike

Until this past week, my current stable consisted of bicycles with carbon, steel and aluminum frames.

The carbon bike is my Canyon Ultimate CF -- my racing and all around frame.

The aluminum bike is my 2006 Bianchi Pista Concept -- a track bike and my fixed gear commuter for getting around Tokyo.

The steel bike is built from the frame I built (designed, cut and welded) at UBI this February, a cyclocross design, eagerly awaiting trips into the mountains later this year.

What frame material is missing?

Yes, titanium.  My collection has been missing a titanium frame for the past 4-5 years.  This material -- lighter and stronger than steel, rustproof, more compliant and less brittle than aluminum, with more road feel than carbon -- is in many ways an ideal frame material.  At one point in the mid-00s, raw material prices spiked and Ti frames became quite expensive, but prices have moderated since 2008 or so.

Also missing was a "travel bike" -- one that I can take with me when I travel by air and still avoid excess baggage charges.  I got fed up in recent years paying 15,000 yen to ANA, as much or more on Air France, 100~150 Euros on Lufthansa, or $200 on United to or from the U.S. or Europe.  Not only is my bike case large enough that the bicycle is treated as "oversize" and "special" luggage, but in a hard plastic case the bike is heavy enough that it is difficult to squeeze into a 23 kg per bag weight limit, when applicable.  Even with my newer Biknd Helium case and the Canyon carbon frame, I am usually right at the 23 kgs limit -- and quickly go over if I use any of the remaining space in the frame for other gear.  Of course, each airline and cabin/service class is different, so packing for a trip requires great care if you want to avoid unpleasant surprise fees.

The latest insult was my trip to Ishigakijima for the April triathlon.  H.I.S. Travel, the sponsor, warned that there would not be room for all the triathletes bikes' on the flights into Ishigakijima the day before the event and recommended sending bikes ahead by a special Yamato Transport-affiliated service.  I was charged over 15,000 yen, and needed to hand over my bike 2 weeks before the race.  The return shipment, which my hotel in Ishigakijima arranged, via another Yamato-affiliated service, cost less than a third as much, but still took nearly two weeks.  Of course, those who checked bikes on the plane (in rinko bukuro -- it was a domestic flight within Japan, after all) seemed to do fine.

I was pleasantly surprised on my latest trips for the Cascade 1200 in June and Rocky Mountain 1200 in July to be charged only $100 (Delta) and C$50 (Air Canada) each way for trans-Pacific flights.  But other airlines do not seem to be reducing their charges, and why should I put up with this at all?

The solution came via Tim Smith/GS Astuto -- a 3 Al/2.5 V titanium frame with S and S couplers.

The frame was delivered "bare bones", without fork or headset, barrel adjusters for the shifters or even bolts for water bottles and such.  But even if the frame arrived "bare bones", this is a premium product at a very reasonable price.  Indeed, the construction and weld quality looks excellent; it has the complex and time-consuming S and S couplers (which typically add $500 to $1000 to the price of a frame in the U.S., and required Tim to arrange some new tooling for the factory where his work is done in China); it has braze-ons for 3 water bottles, as well as for rear racks/fenders, and seems very sturdy, but reasonably light.

The frame has classic road bike "sportif" geometry.  Not a pure climber or pure sprinter's racing bike, comfortable with a slightly longer wheelbase -- 420mm instead of 410mm chain stays, a bit of extra clearance here and there, a rock solid feeling with a 34.9mm seatpost and single butted Ti tubing -- not trying to shave off every last ounce at the expense of durability.  And it has an additional feature I have not seen before on a Titanium frame -- asymmetric chain stays, like Pinarello and some of other carbon frames in recent years.  The stays are quite beefy to begin with, but the right chainstay is laid out vertically and the left horizontally.  This should provide plenty of stiffness when I put the hammer down, but also some additional compliance over bumps.  The frame should work very well for Audax randonees.

For GS Astuto, my frame was a test case as they are coming up with a "standard" offer, in addition to their more expensive custom-measured Ti frame offer.  As a test case, it took quite awhile to get through the system, but the wait was worth it.  Tim plans to offer these as a "standard" product, in 4 sizes, with or without couplers, and with frame pricing in the 80,000 yen (without couplers) and 120,000 yen (with couplers) range, plus consumption tax.  That price will be very hard to beat, especially in Japan.  And, of course, I am sure Tim is happy to deliver a complete bike, or mix and match other equipment options.

S and S seems like a better choice for me than Ritchey Breakaway, Bike Friday or Ravello.

After the frame was delivered, I just needed to buy a "press fit" type integrated Cane Creek headset, which I found at the Y's in Futako Tamagawa, walking distance from my house, after confirming there was no current inventory at my preferred shops.  Fortunately, I already had a really great Reynolds Ouzo Pro all-carbon fork gathering dust in my garage that had been removed from another frame several years back, and a box full of a latest SRAM Red (2012) groupset had arrived recently, at a great price from Bike24 in Germany.  The 2012 SRAM Red groupset comes highly reviewed from Red Kite Prayer, Bicycling Magazine, Pez and others, installation was relatively easy and, to me, the shifting and braking quality seem fantastic, the best I have tried yet.  Of course, the shifting quality may just be the inevitable superiority of a new, clean groupset ....  The ergonomics are great as well.

I did not get some of the fancier options, such as the integrated power meter.  And I could not get a compact crankset -- out of stock at Bike 24 and elsewhere.  Nor did they have in stock a SRAM Red 2012 rear cassette in 11-28 cogs, so I went with a Shimano cassette instead.  (The new SRAM Red rear cassette has noise dampers that apparently make it run much quieter than earlier SRAM groupsets).  I will get one, eventually.

Here is the bike, ready to ride.


Asymmetric chain stays -- right is vertical, left is horizontal.  Another view is below.  And very solid looking Breeze-style dropouts. 


One of the couplers.  It can be tightened (and loosened) with a standard fixie lockring wrench.
Nice even welds, good penetration.  34.9mm seatpost.
More nice welds.  Cane Creek integrated headset.
SRAM Red 2012 standard crankset
SRAM Red 2012 -- nice big shifter paddles, stylish graphics, very nice ergonomics insteady of the Shimano protruding bulb.  Bianchi bar tape -- I had some red cork tape, but it tore easily when I stretched it. The Bianchi tape seems to be of really high quality, and the color is fine with the silver brushed Ti frame.
Tomorrow I will get an extra pair of shifter cables and rear brake cable.  Then I can install the cable splitters, which will make it possible to separate the bike into "front" and "rear" sections for travel without a need to readjust cabling.

UPDATE (June 2013):  Instead of "Ti Travel Bike", the travel bike will now be known as "Voyage, Voyage", which is true to its function, and will remind me of July 2011 Etape Acte II preparation in Issoire, and the rag tag band's rendition of the 1980s new wave pop classic.

03 August 2012

Cardboard Bike Project

01 August 2012

How to Make it Home when your Shifter Cable (or Shifter) Breaks

This information COULD SAVE YOUR LIFE.   ... if you are stuck on the wrong side of a big hill with a broken derailleur cable (or broken shifter), far from civilization, just when a blizzard is approaching.

But more likely, it will just help you avoid some inconvenience and complete a ride when you otherwise would have needed to abandon and find an alternate way to get home.

Of course, if you regularly ride a fixed gear bike over Kazahari Pass, or if you live in northern Germany or central Nebraska where there are not any real hills, then you can stop reading.

On the Rocky Mountain 1200 we faced some difficult conditions, which caused mechanical problems for many riders.  For me, these:


-- completely shredded my Vittoria Open Pave tires, rear and then front (rumble strips, debris, etc.),
-- resulted in a broken rear derailleur cable and unusable right shifter, 380 kms into the 1200 km event,
-- caused a broken rear spoke at around 620 kms (same old, same old -- and I'm ready for these with a spoke wrench and had no problem riding home with 35 spokes remaining),
-- resulted in lots of roadside debris sticking to my tires, triggering at least 3~4 flat tubes over the course of the event (after NO flats on Tohoku 1700 or Cascade 1200),
-- broke the base mount of my Phillips Saferide LED light -- it snapped off during the final descent, I think from the combination of violent shaking (rumble strips) maybe added to the metal fatigue of repeated adjustments,
-- contributed to a broken closure/snap on my 4-month old Ortlieb handlebar bag, as I fumbled in the cold to open and close it too many times,
... and on and on.

The largest single mechanical difficulty was the broken rear derailleur cable and shifter.

Like any sensible randonneur on a 600 km or longer event, of course I carried a spare shifter cable. But in the near-freezing rain, wind and gathering dark of the Yellowhead Highway early evening on Monday July 24, about 65 kilometers west of Jasper, Alberta, I could not get the replacement cable properly threaded in the Shimano 7800 STI shifter.  Maybe some of the old cable was still jammed inside.  Or maybe I did not properly set the shifter to the lowest gear by pushing the small paddle repeatedly before I threaded the new cable.  I do not know.  Whatever the cause, the new cable was quickly tied in knots inside the shifter and the shifter was non-functional.  So I rode the bike in 34x11 gearing the rest of the way to Jasper.

At the Jasper control, Patrick was offering mechanical assistance, and had a nice big tool kit next to the check-in desk.  But he also was checking in riders, signing brevet cards, checking out riders, offering information, pointing people to the showers, food and sleeping accommodations, and dealing with emergencies such as randonneur hypothermia (like the rider I saw in the back seat of a good Samaritans' van that had stopped and picked him up in response to his plea as he froze at roadside on the descent from Yellowhead Pass -- which van then had followed me all the way in to the control, stopping and waiting patiently as I hunted, pecked and backtracked through the last few turns in town).

At first, Patrick gave me the bad news.  He said there was no way to fix the shifter, at least not on site and not in time for me to continue.  He said he had taken apart an STI shifter once several years ago, using a very complex rig so that springs did not go flying all over the shop floor.  Not something that would be possible in the Jasper control.  I was resigned to the possibility of a DNF.

A few minutes later, as I ate, Patrick came over and said that he thought he could rig the bike so I would have a 2-speed, with a fixed rear cog (of my choice), and the ability to shift between the 50 and 34 rings with the still-functioning front derailleur.  If I wanted to change the rear cog, I would need to get off the bike, get out an allen wrench, force the derailleur into position and re-set the cable either shorter or longer than before.  I was elated -- he was offering a way to continue!

The elation wore off as I realized it might be a very long 750 kms, riding a 2-speed bike.  Still, if I could set the gears low for the big climbs ahead -- Sunwapta Pass and Bow Summit -- then I could limp along much of the way thereafter.  A 1200 km randonee with a 90 hour limit requires that one complete the first 600 kms in 40 hours, allowing 50 hours for the second 600 kms.  And everyone I had spoken to advised me that for the RM 1200, you just need to make sure to get over the big hills within the time limit, and then the second half would be much easier.

Anyway, enough of a prelude, and on to the lesson.  What to do when your rear derailleur cable breaks?

First, remove all the pieces of "outer" cable lining and the broken "inner" cable.  Stow the outer cable for future use.

Cut a length from the broken inner cable approximately 20 cms / 8 inches in length.  Tie a knot near one end of this length.  It will look something like this:

(If you do not have any way to cut the cable, then do not worry.  Just tie the knot about 6 inches from one end of the cable ... you will just need to wrap all of the extra cable around your stays and frame to keep it out of the way as you ride.)

(If you happen to have a cable or portion at least 6 inches long that still has the "knob" on one end, then you can use that instead.)  It would then look something like this:


Once you have this piece prepared, you thread it through the barrel adjuster on the rear derailleur, from the rear, with the knot/knob stopped up against the rear side of the adjuster.

You then shift the derailleur/chain -- with your hands -- so that it is on the desired rear cog, and tighten the bolt and plate to the unknotted portion of your cable. I don't have a photo of this, exactly, given a subsequent improvement on the repair, but the relevant part of the bicycle looks like this:


The "knot" or "knob" would come into and rest against the barrel adjuster from the bottom of the photo, and the other end of the cable piece would be secured under the bolt and plate toward the top of the photo.

Using this method, the derailleur can be "fixed" to any gear if you use your hands to move the derailleur and chain into position (preferably while spinning the crank) then tighten the cable at the proper length.

You can even adjust the setting slightly by turning the barrel adjuster.  Maybe you will get a 4 speed rather than a 2 speed without getting out the wrench.  If you use a knot, however, you will find that the knot sticks somewhat at the adjuster and the cable twists as you try to turn the adjuster, so it may not be easy to turn the adjuster very far, or it may spring back when you release it.  At least I was able to turn the adjuster enough to "fine tune" and have the chain set directly over a cog.  Twisting cable is not an issue with the knob.

After another 300-400 kms, John B. did a better jury-rig using a longer spare cable that had the knob still on the end, threaded that all the way from the barrel adjuster on my downtube and reinstalled the "outer" cable that you see in the photo.  So I was able to shift one or two cogs on the rear cassette just by turning that barrel adjuster on the downtube -- without getting off the bicycle -- for a real 4 or 6 speeder!

This is a trick I will never forget.