25 February 2013

The iPad presented us with flash problems, thus a bit of a late post....

PE Europe had an impromptu celebration of Stephen's birthday in Dublin on 27th December 2012 en route to the far west of Europe to scout out routes for the Positivo Craic summer tour 2014ish.

No bikes this time, but Sweet Molly Malone's wheelbarrow has two wheels...

We found the perfect map for the job:


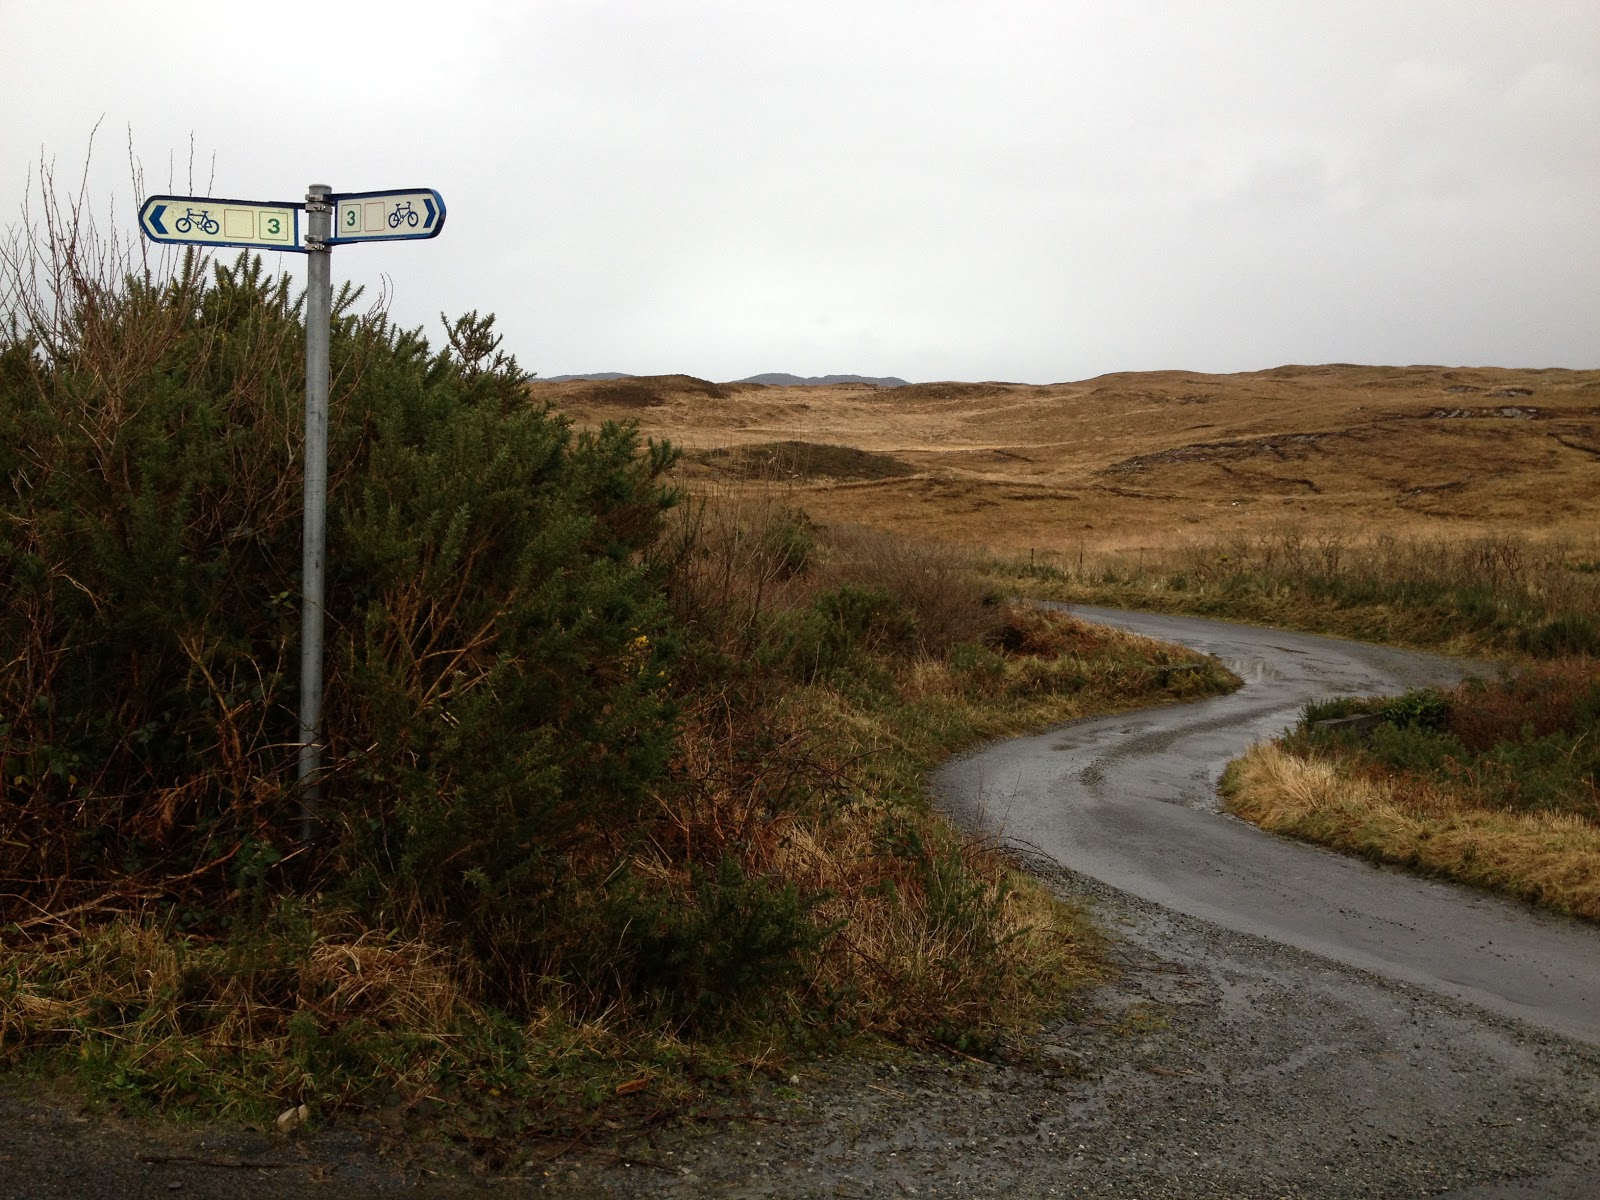
Beautiful quiet roads, empty sandy beaches, torrential rain, gales what else could you want?
Errrr, sunshine?


23 February 2013

Updated Fender review -- Curana C Lite alloy, Axiom Fastback DLX Reflex, SKS Raceblade Long, Procraft Rainbow Race 35, SKS Xtra-Dry

Fenders are for shopping bikes, commuters, and old geezers on touring bicycles with full panniers and unpadded leather saddles.  At least that was what I thought for many years, as an aspiring road cyclist zooming in and out of Tokyo with the Positivo Espresso train.

Yes, I would use a "clip on" seat post fender for riding in the rain.  But mostly, I would just avoid riding in the rain, or get a bit wet.

Then I started doing longer Audax rides.  The rides are scheduled long in advance, and go through several days, different geographies, and you will not finish many (any?) if you just skip the ones where rain is a possibility.  Thinking back over the past 3 years, I have gotten wet on EVERY Audax event I have done that is 1000 kms or more.  2010 Chubu 1000, 2011 PBP, 2012 Tohoku 1700, 2012 Cascade 1200, 2012 Rocky Mountain 1200.

Now I seem to get rain even on mid-length brevets.  We had rain during much of the night on the October 2012 Kanagawa 600, and again at night for the last 6-8 hours of the January 2013 Kinki Audax 400.

Cyclist culture varies by geography with regard to fenders.  Lots of riders in Japan complete audax events fenderless, even if rain is forecast.  The same in Europe, where lots of the PBP riders did not have fenders or true "randonneuring" set ups, and were on typical road racing bikes with 700x23mm tires.

But try to ride a Seattle International Randonneur (SIR) event in the rain without fenders and you will be treated just slightly better than a leper.  I started Cascade 1200 in June 2012 with just my seat post clip-on blade fender, and was soon firmly told to move to the rear of the pace line (in a voice that included a bit of thinly disguised contempt--a tone rare during Audax events and more suited to racers).

Apparently a rear fender with mudflap is intended primarily to prevent water from splashing the rider behind you, and is considered an essential part of cycling etiquette in those rainy parts.  Indeed, a blade, or larger rear seatbag, will protect my backside reasonably well, but does nothing for the person trying to draft behind me.  And as sage Sheldon Brown noted, fenders protect your bike from the road grit that can get inside your headset and, to some extent, reduce the amount of grime on your derailleur and brakes.
Seat post clip-on blade fenders on my aluminum and titanium bikes - just keep the spray off my back
So when I was in Vancouver BC last July, before RM 1200, I paid some attention to the wall full of fenders in each bike shop that I wandered through.  Again, fenders seemed to be essential equipment in a city where it rains all winter.

--------------------------------------------------------

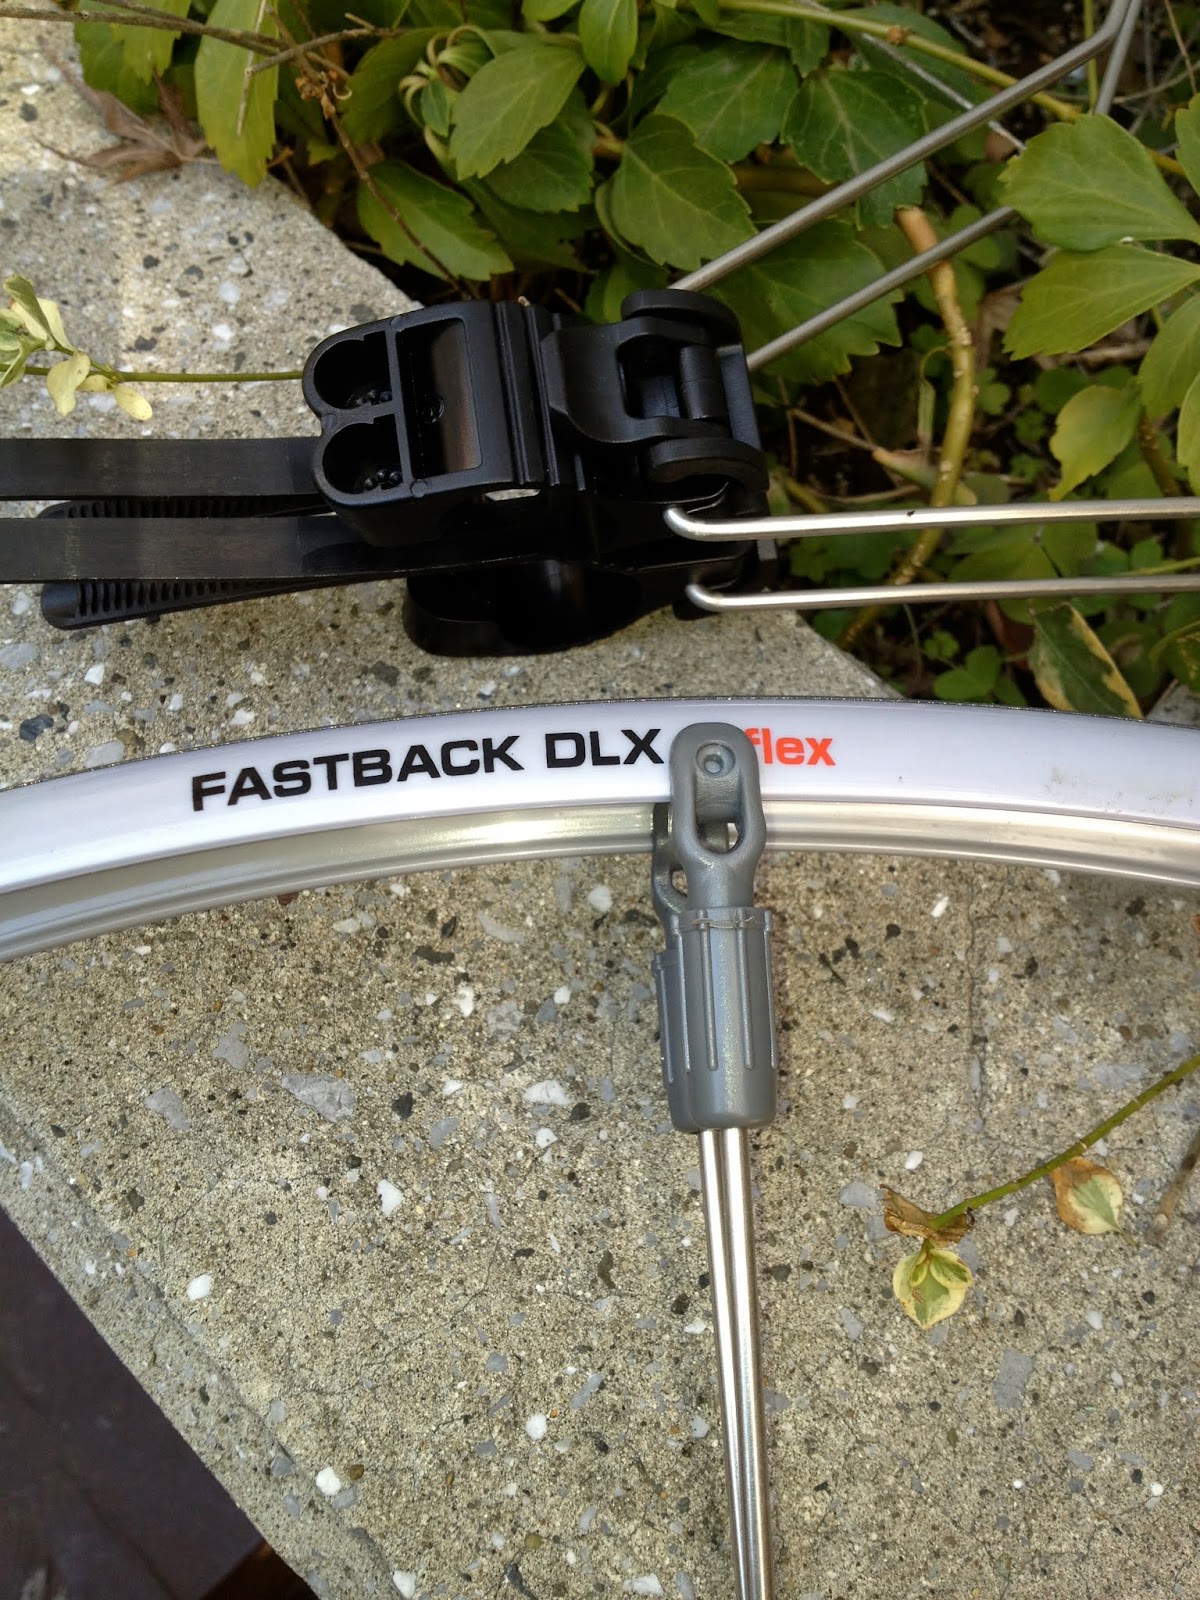
Axiom Fastback DLX Reflex.  I picked up a pair of clip-on plastic fenders that are designed to fit on a road bike that does not have fender attachment eyelets or significant extra brake/fork clearance.


These clip-on fenders, the "Axiom Fastback DLX Reflex", have mudflaps and a very nice reflective stripe.  Unfortunately, they do not attach well to my Reynolds Ouzo Pro fork.  And without eyelets and bolts to attach the fender directly to the bicycle frame, I could not manage to install them on a road frame in a way that is stable or did not rub against my tires, even when I used a 700x23 tire.  They were worthless for me.  Then again, they were not expensive, and I thought I might even cannibalize the mudflaps and some portion of the reflective striping.  BUT SEE BELOW -- I got these to work with a different fork and they are just fine ...

--------------------------------------------------------

Procraft Rainbow Race 35.  Also in 2012, I ordered a cheap (18.50 Euro) pair of Procraft Rainbow Race 35 black plastic fenders that  require eyelets and use traditional hardware.  These I planned to use on the steel Yamabushi, with its cyclocross clearances and ample braze-ons and eyelets.

I only tried to install them in January, after putting the disk brake on the Yamabushi.  The disk brake completely blocked the path of the metal rod you can see in the photo, which extends from the eyelet near the front hub/axel and attaches at two places on the front fender.  With a metal rod on each side of each fender, there are 4 rods attaching in 8 places in all.  And they are way too wide and thick for my other bikes, even the Ti Travel Bike with its relatively generous brake clearances.

So they will sit in the garage, unusable and unused, for the time being.

--------------------------------------------------------

Curana C Lite Alloy.  In late February, I rode the Yamabushi home from work, and stopped at the Potavel shop near the corner of Komazawa Dori and Kyu-Yamate Dori.  They had what looked like a very nice, light weight aluminum fender.  Better yet, the fender was noticeably stiffer than the plastic Procraft, and so required only a single rod for each of front and rear.  The rod attaches to the eyelets on both sides of the hub.  And since I had the bike with me at the shop, I could confirm that the disk brake would not interfere with the fender rod, nor the rod with the brake.  I bought the set and did the installation as soon as I returned home.

Front fender -- single rod wraps around the wheel and does not block the disk brake.
These Curana CLite alloy fenders are really great.  They look nice (to me), fit well, are stiff, easy to install and very light weight (apparently they are made from two thin aluminum layers, with plastic in between -- achieving much greater stiffness and weighing 30% less than plastic).  Yes, they did cost a bit more, around 5500 yen ($60).  But that is not so much considering that I wasted money at least the Fastback clip ons.  Highly recommended.


These fenders won an award at Eurobike 2008 ... so I am a bit late to the party!

They are now tested over many commutes and a few rides outside the city, and work as advertised.

My experience with the Procraft Rainbow 35 (useless for now) and the Curana C Lite Alloy (a great purchase) speaks to the importance of not buying a product online unless and until you really understand how it works with your bicycle.

--------------------------------------------------------

Rear Clip-on Blade -- SKS Xtra Dry 3.  If you do want a rear clip-on blade fender, I swear by the SKS Xtra Dry 3.  It is designed for wide mountain bike tires, so still does the job even if knocked a bit off center.  The clip-on mechanism is very easy to use and adjust.  And it is light weight, fits easily in luggage, etc., etc.  Perfect for use on a road bike during a rainy one day event.


---------------------------------------------------

Update.  The Axiom Fastback DLX Reflex fenders work!

Fender clearance
I got a cheap Tifosi replacement fork for my Ti Travel bike, which has grommets for fenders, more room around the tire area and narrower blades.

I was going to put on the plastic traditional fenders, ... but need to tweak one piece of connecting hardware, so tried the Axiom Fastbacks.
They do fit, both front and rear, and seem reasonably secure.  And the mud flaps protect riders to the rear, unlike some other clip-on fenders.

No rubbing, with 700x23 tires on fairly wide rims (Velocity A23 or HED Belgian).  And now I can report that they also work with 700x25 tires (Conti Four Season Gran Prix 700x25), and over lengthy rides in the rain (14 hours of rain on the May 2013 Kanagawa Audax 400km Okitsu Classic).

The "quick release" feature is great.  I was planning on installing traditional fenders on the Ti travel bike ... but I very much like the QR feature -- the ability to remove them in a few seconds and just leave the hardware on my fork and seat stays -- I will stick with these for the time being.

Two minor issues.  First, the plastic latch that secures the right side of the rear fender broke.  Still, the fender stayed secure even without any latch over a 2-day ride.  And I was able to use superglue and a minor reinforcing piece to revive the latch, at least for the time-being.  Two months later, the plastic latch for the front left attachment also snapped off as I tried to assemble my bike after a train journey and put the fender on at the beginning of ride.  Again, these latches seem unnecessary ... but if they break, then why have them at all?

Second, the rear fender ends at the brake/seat stay, and so in heavier rain/standing water on the road there is definitely some spray off the wheel onto the seat tube and back of my legs.  Still, it is good to get 90% of the protection of a full fender with something that can come on and off in a minute or two.  Perfect for the travel bike.

Third, the fender attachments form large, ugly attachments on the fork and the seat stays.  These are semi-permanent features, even when the fenders are removed during travel or a ride on an entirely dry day.  I am not so worried about the aerodynamics, but these large plastic clumps defeat at least one of the reasons for a removable-style fender.


--------------------------------------------------------
Update.  SKS Raceblade Long plastic removable fenders!  After a bit of browsing on Amazon, I realized that there is one removable fender that fits road bikes, is reasonably priced and seems to get near universally positive reviews.  Also, even though the product is manufacturer-rated for 18-23mm tires, online comments suggested that it works just fine with 700x25mm tires as well.  I purchased a set a few weeks ago from Wiggle (after carefully studying the attachments to confirm that they ought to fit my Ti Travel bike).  They arrived at the end of June and are now installed.

The "semi-permanent" attachments are smaller and less visible than on the Axiom Fastbacks.  The main attachments are small metal pieces that fit onto the front/rear quick release skewers.  By using the QR skewers, instead of some user-selected location on the fork and seat stays, the location is certain every time the fenders are taken on or off.  This allows use of a fixed length fender stay that wraps around the fender.  The fit is perfect for a 700x25mm tire (or 23mm or 20mm).  No need to tweak it.  No worries about the fender adjustment getting re-set after the bike leans against a wall and something gets knocked out of kilter. 
The other semi-permanent attachments attach to the brake.  One sticks out toward the rear, clipping to the main fender body.  A second sticks out to the front, allowing a 150mm attachment extending around the wheel in front of the fork (front) or seat stay (rear).  Significantly better coverage than the Axiom Fastback, without the need to fit a fender through a narrow area under a road bicycle brake.  Plus, as with the Axiom, the product includes mudflaps for extended coverage.  No backwash for a rider following in a paceline.  
On the other hand, there is still slightly less than full rear fender coverage along the seat tube, and no front or rear coverage under the brake itself.  
One of the semi-permanent attachments looks like this:
Although it take a bit of work to get these installed in the first instance, once they are on, the fender just slides on, and comes off with a small push on a tab.  
Here is the 150mm attachment to the rear fender, with the plastic tab visible:
Assuming no problems experienced over the next few weeks, I will use the SKS Raceblade Long fenders instead of the Axiom Fastbacks for London Edinburgh London.
"Final" LEL setup, including SKS Raceblade Long fenders?


New Acquisition - 3 wheeler

We got some new wheels for our youngest, Max, age 8, recently.  On sale recently at a nearby shop.


Max has had some back problems (herniated disk) ... and seems to be showing his age after many years of perfect health.  I just hope that once he mends he will be able to go up and down the stairs in our house again at least for the next few years!

17 February 2013

Kita (Nishi) Kaze ni Makeru Na! Don't give in to the North (West) wind!

If last week's Gunma 200 km Brevet was a bit of a disappointment because of the 530AM Sunday traffic on the Kanetsu expressway and the lack of true Gunma February winds ... yesterday's 300 km Aoba Randonneurs-sponsored event met and exceeded all expectations.

Notably, it was another one day ride that included the stretch in Gunma east of Takasaki, and at two points (that I noticed) took the same roads as last week.

But this time, Jerome and I would get to and from Gunma by bicycle.  And we also could get to and from the start/goal by bicycle.  So no traffic jams, no tolls, no gasoline stations.  And we could ride 300 (actually 330) instead of 200 kms, leaving home at the same time and getting back only a few hours later, after a family restaurant stop at the finish with Tominaga-san and the organizers near Yanokuchi.

The temperatures were cold, below freezing the first few hours and again at night, never really warming much in the day, despite sunlight.

And the wind was fierce, much of the time above 10 meters per second (40 kph/25 mph), and gusting higher.  This was the true "don't give in to the wind" ride.


Jerome and I were the first riders through the bike check and started out with another faster rider who, fortunately, knew the route well.  We were caught at a traffic light by a large group after about 2kms, but the fast rider gunned it over an overpass (on which bicycles were permitted, I might add), and Jerome and I did our best to follow.  Pretty much everyone else took the surface road, and it was another 30 or 40 kms before we saw a few others.  The fast rider would pull ahead, then we would catch him at the next red traffic light -- a pattern that went on for at least 20 kms.  These roads are not pleasant at mid-day, but between 6 and 8AM on a winter Saturday morning, they were fine.

We got really fierce headwinds on the stretch running NW toward Takasaki.  Jerome was working with two other riders, but I was well back, alone. Crossing the bridge pictured below, SW of Honjo, I managed only 14 kph, even though I had refueled with an energy bar where I snapped this photo.


The run to the east from Takasaki to Tochigi was fast and easy -- flat and with a tailwind.  The only issue was congestion amid the suburban sprawl around Isesaki, as it was now mid-day.

There was a memorably nice stretch (with tail/cross wind) along the top of a levy Northwest of Koga (Ibaraki).   And other nice stretches as the course hugged the hills of western Saitama north of Hanno.

We struggled going straight into the wind around Hanyu and Gyoda in northern Saitama, fatigued from having ridden more than 200km.  Jerome pretty much pulled me through that stretch at a speed of maybe 20-21 kph.
I wore my PBP vest and yellow Assos wind block jacket, the latter in honor of Juliane P.'s yellow Assos and also with a hint of Uma Thurman's yellow jump suit in "Kill Bill".   Kita Kanto Expressway above.
Jerome, at what he declared one of our "best rest areas" -- tucked beneath the pillars of the Kita Kanto  Expressway, cars roaring by behind and overhead, modest bits of trash strewn around.
At the 250km last control point, with 57 kms still to go, it started to get really cold.  Tominaga-san, who had pulled in to the prior controls just as we were leaving, had closed the gap and arrived only 5 minutes or so after us.  We have seen him at many other events, and he was one of the few finishers on the last Brevet I rode with Jerome -- the October 2012 600km Kanagawa monster.  Jerome and I rode with him to the finish.  Jerome and Tominaga-san opened up a gap on me on the longish, very gradual hill south of Hanno, but they waited for me on the other side, and I could keep up (and pull my share) the rest of the way to the goal.

We were finishers 6, 7 and 8, out of close to 60 who started, with a time of just over 15 hrs 30 mins.  The next cohort did not arrive until 50 minutes later -- the wind taking its toll.

11 February 2013

Not-Epic Brevet

On Sunday I joined the February 10 Gunma Audax 200 km Brevet, titled by its organizers「北風に負けるな」, which roughly translates as "don't lose to the North Wind".  

I had tried to sign up for a few 200km Brevets closer to town ... but the inevitably filled up the instant that online sign-up opened.  Audax Japan is considering establishing a series of "permanent" courses, like RUSA and some others, to take the pressure off of the applications for the shorter brevets.

And what is the point of a 200km brevet in any event?  No night riding.  Nothing epic.  And not a race.  

Still, I have struggled with 200km events in the past.  In early March 2010, I rode one out of Utsunomiya while recovering from a shoulder injury, also early in the year.  I was on record pace until I had a flat tire that took 15-20 minutes to fix along a path in a hillside.  Then I struggled the last half of the route, into headwinds and eventually dark with an elapsed time over 11 hours.  In January 2011, I rode one in Shizuoka, that had one of the stiffest headwinds I can remember ever facing on my bicycle.  The cold and wind made it really slow, and epic in its way, almost 12 hours in all.  Last year's 200 km events were Day 3 and Day 4 of the Tohoku 1700, much of these routes along beautiful coastline in Akita and Aomori, and sandwiched between more challenging 600km and 300km events.   That is the right way to plan a 200km Brevet!

This year, I just wanted to get the 200km ride out of the way, so I will have my 200/300/400/600km series by mid-year, and qualify for an event I want to do this summer.

The Gunma course was flat, much of it through mixed use, sprawl and farmland that covers much of the flat areas of Japan.  There was some wind, but not enough to slow us down.  The weather was what I would expect in December in Kanto -- clear, dry and cold, but with a high of 8 degrees C.  No February rain or snow this weekend, at least.

The biggest challenge was the traffic jam on the Kan-Etsu highway.  I left home at 450AM, expecting to arrive around 630AM just in time for the "briefing" and 650-700AM start.  Instead, I found myself sitting in traffic on the main expressway out of Tokyo to the Northwest.   No accident, no construction, so why was there a traffic jam at 530AM on Sunday in the middle of a 3 day weekend?  A reminder of why I avoid driving in Japan whenever possible.

I made it to the start area at 7:23AM, a few minutes to spare before they closed down at 7:30AM, having called ahead to one of the participants who warned the organizers to expect me.  I signed in, completed my bike check at 7:28, and went back to my car to get prepared to ride -- shoes on, etc.   I set out around 7:35 or 7:40, the last participant onto the course.  I pushed the pace at first, then moderated once I started to see and pass other riders.  

I stopped for food/rest at 67, 101, 140 and 170 kilometers, the only official checkpoint being the 101 km turn around, the others just randomly selected convenience stores from among the hundreds and hundreds that this course passed.  I rolled back into the finish at around 425PM, for an official time of 8 hours 57 minutes, about 3 hours faster than the Shizuoka 200km from 2011, almost 2 1/2 hours faster than the Utsunomiya 200km from 2010 ... but still very much a Brevet pace.  Not anywhere near fast enough to contend with the stronger riders at Tokyo Itoigawa, for example.

The ride itself was uneventful.  There were some nice views of rivers and of mountains to the North and West, and lots of sprawl.  The organizers were limited in their choices for a course in February in Gunma.  Any attempt to leave the flat plain around Takasaki and to the Southeast would risk snow and ice.  So this is what I expected, and not bad for a February ride.  

We were greeted at the finish with bowls of hot "tonjiru" (pork soup), hot water for coffee, and folding chairs in a tent to chat and rest for awhile before packing up and heading out again into the traffic.

02 February 2013

The Power of Kawaii?

This just in -- a scientific study asserting that viewing cute ("kawaii" in Japanese) images improves performance of various tasks.  No, not related to cycling, but bizarre enough to be worth taking note.  It must be the Japaense love of "kawaii" that has led to its precision manufacturing prowess!

And if it works with fine motor skills, then ... could it also work with athletics?  I guess it is not likely to help with strength and endurance sports such as cycling or running, but maybe in the future NBA teams will try to boost their free throw shooting percentages, and golfers to improve their putting scores, by carrying flashcards with their favorite photos of puppies, kittens and other baby animals?

27 January 2013

Club des Cingles du Shiroyama

In France, long before the high passes in the Alps (or Pyrenees) are free of snow, cyclists can train for big climbs on Mt Ventoux.  To scale this monster, one ascends from only a few hundred meters above sea level to the summit at 1909 meters.  The mountain is visible from far, far away, the white rock of its upper slopes reflected in the sunlight throughout much of Provence.  And as every road cyclist and fan knows, Mont Ventoux has been the scene of many epic moments in cycling.

Ventoux has a special place in the heart of British cyclists.  The last time Britain was a strong competitor in cycling (until the Wiggins/Cavendish era we now see) was the 1960s, and Ventoux is the location where, in 1967, British cycling great Tommy Simpson collapsed and then died on the last stretch toward the top, his blood containing a mix of amphetamines and alcohol that likely contributed to dehydration and death.  Most recreational cyclists who do the climb will stop and pay homage at the stark granite memorial to Simpson, just a few steps up hill from the place where he came off the bike for one last time.
Tom Simpson, 30 November 1937–13 July 1967
Like many things in cycling, there is always a group that tries to take it to an extreme.  With Ventoux, it is the Club des Cingles du Mont Ventoux.  Entry into the club is simple -- just complete the climbs up (and down) each of the 3 paved routes to the summit of Mont Ventoux in a single day.   Pez Cycling has a good description of a day spent joining the club a few years back.   The Dutch and Belgians seem most taken with this Club.  Perhaps due to lack of mountains in their home countries worth climbing?

This morning, Sunday, was cold and clear, as Tristan, Tom and I headed for the rolling hills of Onekansen.  (James and Tim also rode the early part of the route, but did not head out Onekan, sticking instead to their regular route).  We found ourselves riding with two Japanese as well, trading places.  I was in the back on the hills, Tom and Tristan in the front, the Japanese usually in the middle.  Tom, of course, had ridden over 210 km on Saturday (Miura Peninsula plus some extra), and was joining us solely for a recovery spin.

Eventually, we made our way onto Machida Kaido, and started to discuss our destination for the day.  It would be too cold for climbing into the high mountains.  No Yanagisawa or Odarumi Passes today.  No Nagano or Chichibu for several months.  We needed to find a hill closer in, one where we could get our work in so we would be ready for big climbs later in the year.

All of a sudden, there it was, staring us in the face:  the ascent to Lake Shiroyama and Honzawa Dam.  There are 3 approaches, the "main road" from the South side, which meets Route 413 at a traffic signal within 500 meters or so of the dam across Tsukui-ko, and the 2 smaller roads up the East side, up parallel valleys that are deceptively gradual until the road rises to 12-15% grade for the last bit.   If one would ride each of these climbs, we would have our own Club des Cingles du Shiroyama!

We started on one of the East side roads and made it as far as a locked gate.  One of the Japanese cyclists -- riding a Canyon CF SLX -- was with us, and neither he nor Tom looked willing to hop the gate, portage over a few meters of snow, and continue up.  So we descended back to the bottom and did the other route up the East side, all the way to the top.  We said farewell to our Japanese friend, descended toward 413 on the South approach, took a left through a tunnel and looped around (and up over one of the shoulder of the great hill) to where this road joined the East side ascent near its bottom.

Sure, the climb is short and we had only done it one and a half times, but with the false starts and looping around the base, it felt almost as if we had climbed it three times.  So we declared the new Club des Cingles du Shiroyama, with Tom, Tristan and myself as its founding members.
Tom and Tristan, having just joined the Club, the awesome climb in the background.
We wound our way back to the Tank Road, then made a quick trip back down Onekan, said farewell to Tom, and Tristan and I had an even quicker trip with tailwind (and titanium travel bike + HED Jet 6 wheels!) down road along the Kawasaki side of the Tamagawa.  85 kilometers, almost 800 meters of elevation gain, and home before Noon.  What more could one hope for in late January.

*A check of Google maps suggests that there may be yet another way up, if it is paved and not blocked off so well as to deter even a determined cyclist.  If so, the club membership rules will be duly amended.  Then again, a check of the Club des Cingles du Ventoux rules page notes that there are 4 routes up Ventoux as well!  A climb up the 3 main routes and the Route Forestiere earns the designation Galerien, while a double Cingle (twice up each main route) in one day wins one the rare and coveted Bicinglette -- if a Cingle is extreme, a Bicinglette is crazy.


26 January 2013

LED dynamo light Reviews

I have now had about 15 months trying various LED headlights powered by my dynamo hubs, and want to offer some impressions.  LEDs with good reflectors are real "game changers" for night time cycling, and keep getting better and better.

The Supernova E3 Pro is my favorite.  The Busch + Mueller Lumotec IQ2 Luxos U failed after one ride in the rain, so earns a failing grade.

In thinking about which lights to try, I have relied on two online information sources.

First, there is a good, practical set of English language online comparisons from a website in the Netherlands, here.  I pretty much agree with what that author says, and his photos of various beam patterns are useful.

Second, there is Peter White Cycles in the U.S.  He is the U.S. distributor for SON dynamo hubs and the Edelux lights, among others, and his website has his take on the requirements for lighting, as well as photos of lots and lots of lighting beam patterns taken down a pitch dark road in the New Hampshire night.  The photos are very useful.

A few thoughts:

1.  These LED dynamo lights generally include both wires to connect to the hub for power input and also separate wires for output to an LED tail light.  I have never bothered with dynamo powered LED tail lights, since my Panasonic rechargeable Eneloop AAA batteries and rear lights will last weeks or months set on flashing mode, and even on a constant-on mode (as required by most Audax events) one set of freshly charged batteries will make it through all or most of a 1200km ride.

2.  There are now lots of Japanese LED headlights for use with dynamo hubs, but they are generally for use with shopping bikes, light only the near field and not way down the road, and look ugly.   At this point, stick to the European (primarily German) products for the best lighting.

3.  The nicest looking lights by close to consensus opinion are (1) the Supernova E3 Pro and (2) the Schmidt Edelux.

4.  It is not easy to compare lights.  Some lights include "Lux" ratings.  Others are rated in "Lumens".   (Lux = 1 lumen per square meter, and so takes into account the area lit as well as the output of the LED.  Others have the same brightness in theory, but seem to use more or less efficient LEDs and so get bright at lower/higher speeds.  Others seem to dim somewhat after the LEDs heat up fully.

5.  Brightest is not always best.  If you plan to do trail riding in pitch dark, you want the brightest light and widest beam you can find.  But for most on road riding, you may want a light that draws less power and provides enough light.  And you do not want to blind drivers coming toward you.  I do not need an E3 Pro Triple.  I  find the E3 Pro offers plenty of light and a good beam pattern.  Then again, I might want more light if I was on a fast descent in rain at midnight, or if I had poor eyesight.

6.  Get a light with cutoff switch.  The lights designed for bottle (rim) dynamos are "always on", since you turn them off by lifting the dynamo from the rim.  For a hub dynamo, you definitely want a cut off switch so you can reduce the dynamo's drag during daylight hours, or use the current to charge a USB device.

Which lights have I tried?

A.  Philips Saferide 60 Lux
This 60 Lux light has a beam that throws plenty of light in the distance, but notably also has a very bright, wide near field beam, just around the front of the bike on left and right sides.  This can be useful,  especially at slow speeds and in the city, but also is a bit distracting on long rides in the country at speed, with light shining off the front tire and the ground around you.  It is affordably priced (around 60 Euros last time I checked).

It has a reflector along the front of the mount.  And it fits nicely behind the front road brake mount.   There is also a 40Lux version -- plenty for most uses.

Unfortunately, the mounting tab snapped off at its base an hour or two before the end of the Rocky Mountain 1200 last summer.  I descended a steep hill (on a sunny afternoon), and I think metal fatigue plus intense vibration of the Canadian rumble strips snapped it off.  So I cannot give an unqualified recommendation.  Then again, I was given a refund (still within initial one year warranty period).  And even if the warranty had not covered it, I could buy two or three of these for the price of one Edelux or Supernova E3 Pro.

B.  Trelock 885

This is another relatively reasonably priced light.  It is 40 Lux, and I used it on the October 2012 600km Brevet I rode with Jerome, as well as keeping it on my Canyon road bike since.


The Trelock had plenty of light for an overnight Brevet on Japanese paved roads.  And it also fits nicely behind a road bike front brake mount.  It is not the most beautiful of lights, but it is reasonably priced.

My main complaint with it is that the beam pattern has a sharply defined area and lights only a relatively narrow area of road in front.  This was a major detriment as I descended the North side of Tsuru Pass just after dusk on the Brevet last October.  I could not see the road in front of me as I twisted through turns and the beam lit the corners that I turned through, rather than the road I was turning into.  And once I hit a straight away and really accelerated, I could barely see anything outside of the beam's defined edges.  I almost hit a deer, descending at over 50 kph speed.  Really.  At least I think it was a deer.  I smelled it just about the same time that I saw its shadow.

C.  Busch & Mueller Lumotec IQ Cyo Senso Plus

Busch & Mueller has a dizzying number of different models with different characteristics.  There is something for everyone.  Be very careful when you order to make sure you get the right one.  The first I ordered, in 2011, lacked a cut-off switch, and so is on all the time, unless you unplug it at the hub.  (Jerome has been using it since without complaint).  B&M have 60 Lux models that they advertise as 500% of the brightness required by the German regulatory scheme.  The 60 Lux plastic model is around 50 Euro.

I have been using a 40 Lux version (300% brighter than required) that has some brushed aluminum mixed in with the black plastic, instead of just black plastic, and is costs just under 60 Euro.  I could not bring myself to get the true retro-styled, more expensive and only 30 Lux "Classic" version.


I have been reasonably happy with this light so far, using it mostly on my fixed gear bike for night riding in the city.  The beam is relatively close to the Trelock ... but offers just enough more leakage outside toward left and right sides in order to make on aware of nearby obstructions.  With this light I would probably have seen the deer.

D.  Supernova E3 Pro
E3 Pro with multimount, and wires for tail light wrapped around the mount (eventually I should cut them off as I am unlikely to use them and they detract from the aesthetics).
E3 Pro with handlebar mount
The Supernova E3 Pro is much more expensive than the lights above (it is around 140 Euros).  It is a thing of beauty, feels solid, and comes with either a handlebar mount or a "multimount" that fits well with a V-brake and a cyclocross style fork.  It does not fit with a road fork/brake absent another adapter.  Of course, it is also possible to mount with an axle extension (such as Velo Orange offers in the U.S. or I have found in Japan), but this kind of low light position usually results in too much lighting of the near road and not enough in the distance.

I like the beam pattern.  Unlike the Busch & Mueller and Trelock, which have an LED at the top front of the light, which shines indirectly off the reflector and out onto the road, the Supernova LED is in the rear of the reflector and shines both directly and off the reflector.  The beam is not as sharply defined as my B&M or Lumotec, but rather gradually dissipates at the edges.  And my version of the E3 Pro has a "Terraflux" reflector, designed to spare the eyes of drivers just like a "low beam" auto headlight.  Even so, just enough light expands to see a reflective highway sign overhead.

I used the E3 Pro on the Tohoku 1700 rides last May and again on the Brevet I did last weekend.  I expect that I will use it a lot in the future.

--------------------------------------------------------

I do not have a Schmidt Edelux, though have heard that they are great -- very attractive and perhaps lighter weight and slightly less expensive than the Supernova E3 ... but they use a Busch & Mueller style reflector, and so I somehow find it hard to pay 120 Euros for the Edelux instead of 50 or 60 for the B&M.

The other light I would like to try is the new Busch & Mueller IQ2 Luxos B or Luxos U.  As you can see on Peter White's B&M page, and from his beam photos (worth scrolling way down the page to see these) this has a very bright LED (70 Lux), with a very wide angle beam.  But unlike the Philips Saferide, the near field is not overly brightly lit so as to distract or make it more difficult to see further down the road.  And the Luxos U includes a built-in USB charger for iphone, Garmin or other accessory.  What's not to like?  Well, in the catalogue at least it looks ugly, and it probably draws more current (and creates a wee bit more drag) at the dynamo hub than is necessary in many conditions.

NOTE:  Price information is from Bike24 website, excluding VAT and shipping charges.


--------------------------------------------------------


UPDATE 2013 May -- Busch + Mueller Lumotec IQ2 Luxos U FAIL:

I purchased a Busch + Müller LUMOTEC IQ2 LUXOS U in late April 2013 and tried it on its first real ride on the May 11 400km Kanagawa brevet.

We rode through rain off and on the first 14 hours of the ride, but I was using fenders and riding on decent quality Japanese roads ... relatively smooth, with only limited standing water ... I had no problems with the light during the event.  And though I lacked a side-by-side comparison, the light was definitely bright, brighter than my others and with a noticeably wider beam than any, with the possible exception of the Philips Saferide 60 Lux.

The light came with instructions describing the sophisticated electronic controls, Li-Ion cache battery, USB charger, temporary "floodlight" feature, ... and warning about water getting inside the light's electronics from the bottom/rear, and not to use the USB charger during rain.   I had fenders on my bike during the Brevet, so the light (and my frame) were protected from the worst water ... and indeed my bike and I looked relatively clean at the end of the ride, compared with other similar rides taken without fenders.  I left the USB charger socket plugged the entire ride -- never once even testing the feature.

... But when I next tried the light a few days later, it would only flash on and off.  And when I took an hour test ride on Saturday, the battery would not charge, the light would not light.  And I can see water condensation on the INSIDE of the light's lens.  I have sent a note requesting a return/refund.

A quick check online finds at least some other riders have had the same experience, or other problems.  I am glad I tried this light on at least one rain-filled event before London-Edinburgh-London, and I feel luckly that it did not fail and require me to use my back-up when I was many hours of darkness away from access to enough spare batteries.  For now, I will stick with lights that do not have a lot of extra features, and that emphasize durability and reliability.

If I want to use my dynamo hub for USB charging, it will not be via a system that compromises the core function of lighting.

I should note that Busch & Mueller (via Bike 24) did give me a full refund for the light.  Also, B&M is a leader in bicycle lighting, has some great products, and I know some other riders have taken the trouble to further waterproof the wiring/leads and other potentially vulnerable areas of their LUXOS lights and seem happy with them so far.

UPDATE May 2013:  There is a new Supernova E3 Pro from sometime last year, the E3 Pro 2.  Based on reviews it seems an incremental improvement over the version I have, but basically the same.  I have purchased the attachment required so the E3 Pro fits on a road bike mounted behind/above the front brake.  The E3 Pro has a much more flexible adapter than most other lights, and so I can swing it so that it protrudes out, just a few centimeters above my front wheel and fender.  This gives a lot of clearance for me under my Ortlieb Ultimate Classic 5 handlebar mounted bag ... much easier to use with a handlebar bag than the other lights in this review.

UPDATE August 2013:  A commenter points out that AXA (not the insurance company, but a Dutch bicycle lighting company) now has a dynamo powered headlight with USB charger incorporated, which made it through LEL without incident.  Their website is here ... looks as if they have several models (50 and 70 Lux).  Prices look reasonable, for a light with many of the features of the Busch & Mueller Luxos.  Any others have experience with this?

UPDATE November 2013:  The U.S. "randon" Google group now has several reports of similar failures of the Busch & Mueller Luxos U in or following wet weather, and a miserable experience of trying to finish Super Brevet Scandinavia without much in the way of front lights -- borrowed, dim, spare, weak to dying batteries.  Unacceptable.  On the other hand, there are also reports that the design has been modified slightly to eliminate at least one possible area for leakage.  And there are some other new Busch & Mueller designs out that look of interest. ...

UPDATE January 2014:  Just got the IQ2 Eyc T Senso Plus.  Looks like a great light.  See my post here.

UPDATE January 2014:  Someone pointed out to me the new Magnic lights -- powered by a "touchless" dynamo that sits very close to the rim.  See a review here and article there.  These lights are not quite ready for prime time, but within the next iteration (adding a stand light and somewhat brighter) might be a great option.  I have not seen any real tests showing the light on/off resistance generated by the magnets, as compared to a hub dynamo.  Of course they are more efficient than a sidewall dynamo ...  They do point out the possibilities for lower power, lower resistance dynamos as LEDs get more efficient and systems begin to integrate the latest in both dynamo and LED technology.

15 January 2013

2013 First Brevet

This weekend I rode my first Brevet of 2013 and my first ever Kinki (i.e. Kansai) Audax event.  Where to ride 400km in mid-January, without a near certain cancellation or ice?  Kinki Audax decided to try a route starting in Takamatsu, heading west along the northern coast of Shikoku, over the "shimanami kaido" -- a bike route that goes on bike paths over spectacular bridges, via islands of the seto nai kai from Imabari in Shikoku to Onomichi on Honshu (Hiroshima Prefecture), then eastward back to Himeji, a town west of Kobe in Hyogo Prefecture, famed for its beautiful castle.

We departed at 5AM from Takamatsu in dark and near-freezing temperatures.  I recognized and greeted a number of riders from other events.  3 of the Japanese contingent from RM1200 were present (Kaz Tachikawa, Makiyo Goto and Yoshiaki Philippe Misawa).

The ride in Shikoku was uneventful.  We passed some very nice seashore, and lots of industry.  The roads were mixed but at least traffic was very light on the early Sunday of a 3-day weekend.  The organizers required us to detour out to the tip of land just underneath the Seto Ohashi, the bridge from eastern Shikoku to Okayama.  Since there was no official checkpoint, we needed to take photos of our bicycles with the bridge in the background as proof of passage.  Mine looked like this.
3 lights from Seto Ohashi in the upper left corner -- proof of passage
As we rode through Niihama, an industrial city, I remembered visiting a water park there with my family the one time I had been in north Shikoku previously, on the way from Matsuyama back to Tokyo, more than 10 years ago.  The water slide was great.  The men's locker room had a very large, prominent sign warning that the establishment refused service to persons bearing tattoos.
A nice stretch on Shikoku north shore just after sunrise and before the clouds close in
Imabari Castle moat
It was a relatively fast trip to the second checkpoint, just before we started to cross the bridges -- 157 km in just over 6 1/2 hours, including stops.  At this rate ... I will be done in no time at all.  27 hour time limit, but maybe I can do it in 17? or 18?

Then things slowed down.  After the first long bridge, I stopped at a michi-no-eki restaurant and enjoyed some local seafood for lunch.
Looking back at the first bridge of many
This must be the most expensive bike path in the world -- with bicycle/pedestrian-only bridge entrances in places along the lines of the loop road you can see in the photo, carefully graded, drained, and built to the gold-plated standard of Japanese government contracts.
On the shimanami kaido
But it is nice, and is wildly popular ... in warmer weather.  Even in January there were a few cyclists other than the brevet riders.

Anyway, I ran out of energy before the last bridge approach climb, stopped for an energy bar and managed to make it to Onomichi by around 4:30PM.  227 kms in and still on track for a decent time.  But the Onomichi checkpoint was a Mister Donut in front of the main station.  Onomichi looks like a nice tourist town and there were lots of people there on the holiday weekend.  I waited more than 10 minutes just to buy a donut and get my receipt.  Then after a rest with other riders I went another 20-30 minutes to the East and stopped for convenience store pasta.  On the next stretch I fell in with a couple other riders and we worked together.

But around 730PM the rain started.  At first it was light rain (mixed with sleet).  Then it got heavier, but at least the sleet disappeared.  Eventually I was wearing rain pants and jacket, with plastic bags over my socks, inside my shoes.  The pace slowed.  And slowed.  The rest stops were cold.   My feet and hands were cold ... I had some navigation issues, managed to backtrack without losing much time, rested briefly at a 24 hour McDonalds to recharge my GPS unit, made it through some very dark, rural patches in the hills, and finally to the finish in Himeji.  I wished at this point that I had been riding with Jerome -- who would have insisted on stopping for a proper meal in the early evening.

The last 125 kms was almost entirely riding alone in the cold rain.  But a nice sense of accomplishment to make it through.  In the end, it took me 22:40 or so to complete, and I was something like 16th fastest to finish.  (approximately 100 signed up, 16 DNS and 28 DNF, so only around 55 finishers.)  And there was a good group at the family restaurant in Himeji where we all ate and rested a few hours ... before heading for the morning train home.  By the time the train entered Shizuoka, the scenery had changed to white.


12 January 2013

Something New Under the Sun, or along the Tamagawa?

Sometimes, we ride a route for years, grumble to ourselves about something along the way and wonder why the powers that be do not make a modest improvement.  In this case, I am thinking of the path along the Tamagawa as I head out of Tokyo on the Tokyo (not Kawasaki) side of the river.   Southeast of the Odakyu Line, I ride in the street -- which most of the way between Futakotamagawa and Komae is just a small local road with little traffic and good visibility.

Heading Northwest, just before the Odakyu Line, I join the path and go under the train tracks and a bridge approach ... only to hit a stretch where the choices were (1) a dirt and gravel path, or (2) a road that (on weekends, at least) had at least 3 chains blocking the path to cars and cyclists.  Often, we instead would take a detour through the neighborhood, especially if it had rained recently and the path had large pools of water and areas of mud.
Looking SE at the new plastic posts, where there once was a chain
Finally, as I rode this section in December, a change!  The chains blocking the road have been replaced with some posts that are passable by bicycle.  And at one point, the "detour" through the neighborhood is now blocked off to cars as well, which should keep all except local car traffic off the stretch of road completely.

And of course, just a few hundred meters further North, where there is another gravel section of path and then a narrow, congested area of the (concrete) path for the next kilometer or two, the alternative of taking a parallel road has been dramatically improved as construction finished within the last year or so that makes it possible to stay parallel to the path and quite close to the river most of the way this stretch and the Keio Keirin oval, instead of looping far inland.

03 January 2013

Hakone Ekiden 2013

January 2nd's weather forecast promised sun with a high of 13 degrees celsius.  A classic warm, dry Tokyo winter day, perfect for riding bicycles along the closed roads of the Hakone Ekiden, as in past years:  2012, 2011, 2010, 2009, 2008 and P.B. ("pre-blog") 2007.

Nittaidai (Nippon Sports Science Univ.), our neighbors  on Komazawa Dori in Setagaya, win the relay!
James K. and Shane P. rode out via my house, then we met Laurent D. along the Tamagawa and headed toward Yokohama.  We joined the Ekiden route a little north of Yokohama Station and were immediately welcomed by a large group of cheering fans, as in past years.

As with last year, we were directed onto the "old road" near Totsuka Station, rather than the no-bikes-permitted bypass that we used to take with the runners.

This year we faced very stiff headwinds much of the way, and where we were not protected on the sides -- crossing some bridges near Oiso and closer to Odawara -- swirling gusts threatened to push us sideways, off our bikes and into the guardrail or, worse, into the passing traffic.  At one point,  I unclipped my left pedal and put a foot down.  Laurent, with his deep rim Lightweight wheels, held on for dear life.

We saw a TCC group as we passed them at a rest/gathering spot near Route 16 ... and they passed us back at the Odawara 7-11 that serves as an informal staging area pre-ascent, where James and Shane said farewelll and headed for Odawara Station, as Laurent and I started the last section up the hill to the finish at Hakone Ashinoko.

As we got to Hakone Yumoto, still near the bottom of the climb and far ahead of the lead runners (who were at least 10~12 kms back, not yet in Odawara), a policeman directed us off of the main road and onto the "old Tokaido".  The old road does go up the hill to Ashinoko ... but would take us away from the cheering Ekiden crowds.  After a rest stop, some attempts to find a way around the barriers and rejoin the route further up (we did, but not far enough up, and were quickly pointed down the hill), Laurent and I descended 1-2 kms and stopped at a convenience store for pasta. 15 minutes or so later, the runners came by, in remarkably close succession after 85+ kms.

Laurent and I headed back toward Tokyo, together along the coast as far as Chigasaki.  He continued to Kamakura and took the train home, while I headed inland to take a look at the Keio Univ. Shonan Fujisawa Campus and then continued the rest of the way home through the Kanagawa sprawl via bicycle.  A bit more than 160 kms in all -- an even 100 miles.

It was great to see James, Shane and Laurent after quite awhile, and to get in such a good ride on January 2 to start the year.  Then again, I think with the added police measures to keep us off of the climb, even with a good "cushion" ahead of the runners, the Ekiden tradition may have run its course.

Ekiden ride as far as Hakone Yumoto, then back to Chigasaki and inland to Shonandai/Fujisawa:

From Shonandai/Fujisawa back home:

28 December 2012

A Hard Lesson in Bike Geometry

Last weekend I learned a lesson in bicycle geometry.

At my UBI frame-building class, we learned the basics of why almost all bikes have fairly similar geometry (or "virtual geometry" in the case of compact-style frames), at least within their class -- road, MTB, cyclocross, BMX, hybrid, etc., etc.  As a frame builder, you can experiment with changes ... but will usually quickly find out why your novel geometry just does not work for its intended purpose.

So for the Yamabushi, I followed the traditional geometry pretty carefully, starting with frame measurements from my last two road bikes, and adjusting for a cyclocross build -- with slightly longer chain stays, 425mm instead of 405-410mms, and allowing for a longer fork.

I built up the bike with a Ritchey cyclocross fork, which has a vertical measurement of 391mm from the fork crown to the axle, and an offset (rake) of 45mm.  This is a bit short for a cyclocross fork (they range 390-410mm), but noticeably longer than a standard road fork of 365-375mm.  The extra length allows for fatter tires and mud clearance, of course.  Anyway, the Ritchey works perfectly, and the result is a bike that is comfortable to ride and handles well.  The Yamabushi is not as nimble as, say, my 2007 Cervelo R3-SL was, but it is stable, and it responds well, going just where I point it, when I point it.

Last weekend I put on the bike a new fork with disk brake mount, attached the new Avid BB-7 disk brake and my recently built wheel with a disk rotor.  I  added "The Plug II" (USB charger off the dynamo hub), and was excited to find that everything seemed to work.

I went out for a spin.

The brake is great -- much more control, and better stopping power, than the V-brakes I have been using.  The new front wheel with 50mm carbon clincher rim feels very fast.  The Schwalbe Ultremo 700x28 tires roll fast and are very comfortable with the extra air volume -- perfect for a Brevet that will go over good quality roads.

But the bike seemed to steer oddly.  It felt as if I was steering a boat, with a very little rudder pushing against a strong current.  At first, I thought something was wrong with the headset or the fork installation -- too tight, or too loose?  Or maybe the disk brake cable was gumming up the steering?  After eliminating these choices, I decided to compare the new fork with the one I had removed.
Left side -- a fork too long. 
Sure enough, the new fork has a crown-axle measurement of 410mm, 19mm longer than the Ritchey, and at least 10mm greater rake than the Ritchey.  The longer fork pushes the front end of the bike up, resulting in a reduced head tube angle.  This, plus the added rake/offset, push out the front axle noticeably ahead of the steering axis.

The feeling was odd.  Very odd.  Size does matter.  And shape.

I will try again with another fork as soon as it arrives.

-----------------------------

UPDATE:  I got the new fork, which has the same rake as the Ritchey (45mm) and is in between the two in length 400mm).  The handling is no longer boat-like.  The wheel seems very fast and the disk brake very nice.  The steering is more Cadillac than Porsche, but that seems very stable, and fine for most uses.  Tomorrow I will ride it to work and if all is well, give it a real test the coming weekend.

UPDATE2:  As an experiment, I switched back to 700x35 cyclocross tires (Continental "Speed" version -- for hard packed dirt and pavement, roll reasonably well) from the 700x28 slicks I had tried before.  This increases the effective diameter of the wheel and this the "trail" of the wheel's contact point a bit more, and the handling shifts from Cadillac in the direction of Porsche.  It is a bit odd that fatter tires with more tread result in nimbler handling ... but that is so.

Still, the cyclocross tires definitely roll slower than normal road tires.  I ordered some 700x30 Grand Bois touring tires that randonneurs seem to rave about (distributed in the U.S. by the rider who completed Cascade 1200 with the fastest time this year ...  so they may be fat, but they're not slow!)

UPDATE3:  I noticed that the FSA headset I have had on the Yamabushi (used, removed from frame I rode 2001-2006) was noticeably gummed up.  Some lubricant helped a bit, but still the steering seemed a bit resistant.  Maybe this was at least a contributing factor to the "boat" feeling.  In any event, I put on a new Cane Creek headset I ordered last month.  Yes, I have a headset press and a removal tool,which have now pretty much paid for themselves by getting their first use!  With the new headset and the Grand Bois tires, the front end us very responsive, slightly toward the "twitchy" end of the spectrum.  But when I put an Ortlieb handlebar bag off the front, the handling seems really perfect -- as close as possible to "neutral".  I will ride this combination on a cold 400km Brevet tomorrow.

UPDATE4 (February 3):  I have now used the disk brake and 400mm fork on the 400km Brevet, and since for almost 3 weeks of commuting and riding in the city.  I have come to the conclusion that the bike handling issues I had were at least significantly the result of the gummed up, very old FSA headset.  The bike handling has been just fine with the new headset, with any of 3 sets of tires, with or without a handlebar bag.  If I get some extra time, I might even try swapping back in the 410mm/more rake fork just to see if it is more rideable now with the new headset ... but no time right now.